Click on the Upload icon from the top menu
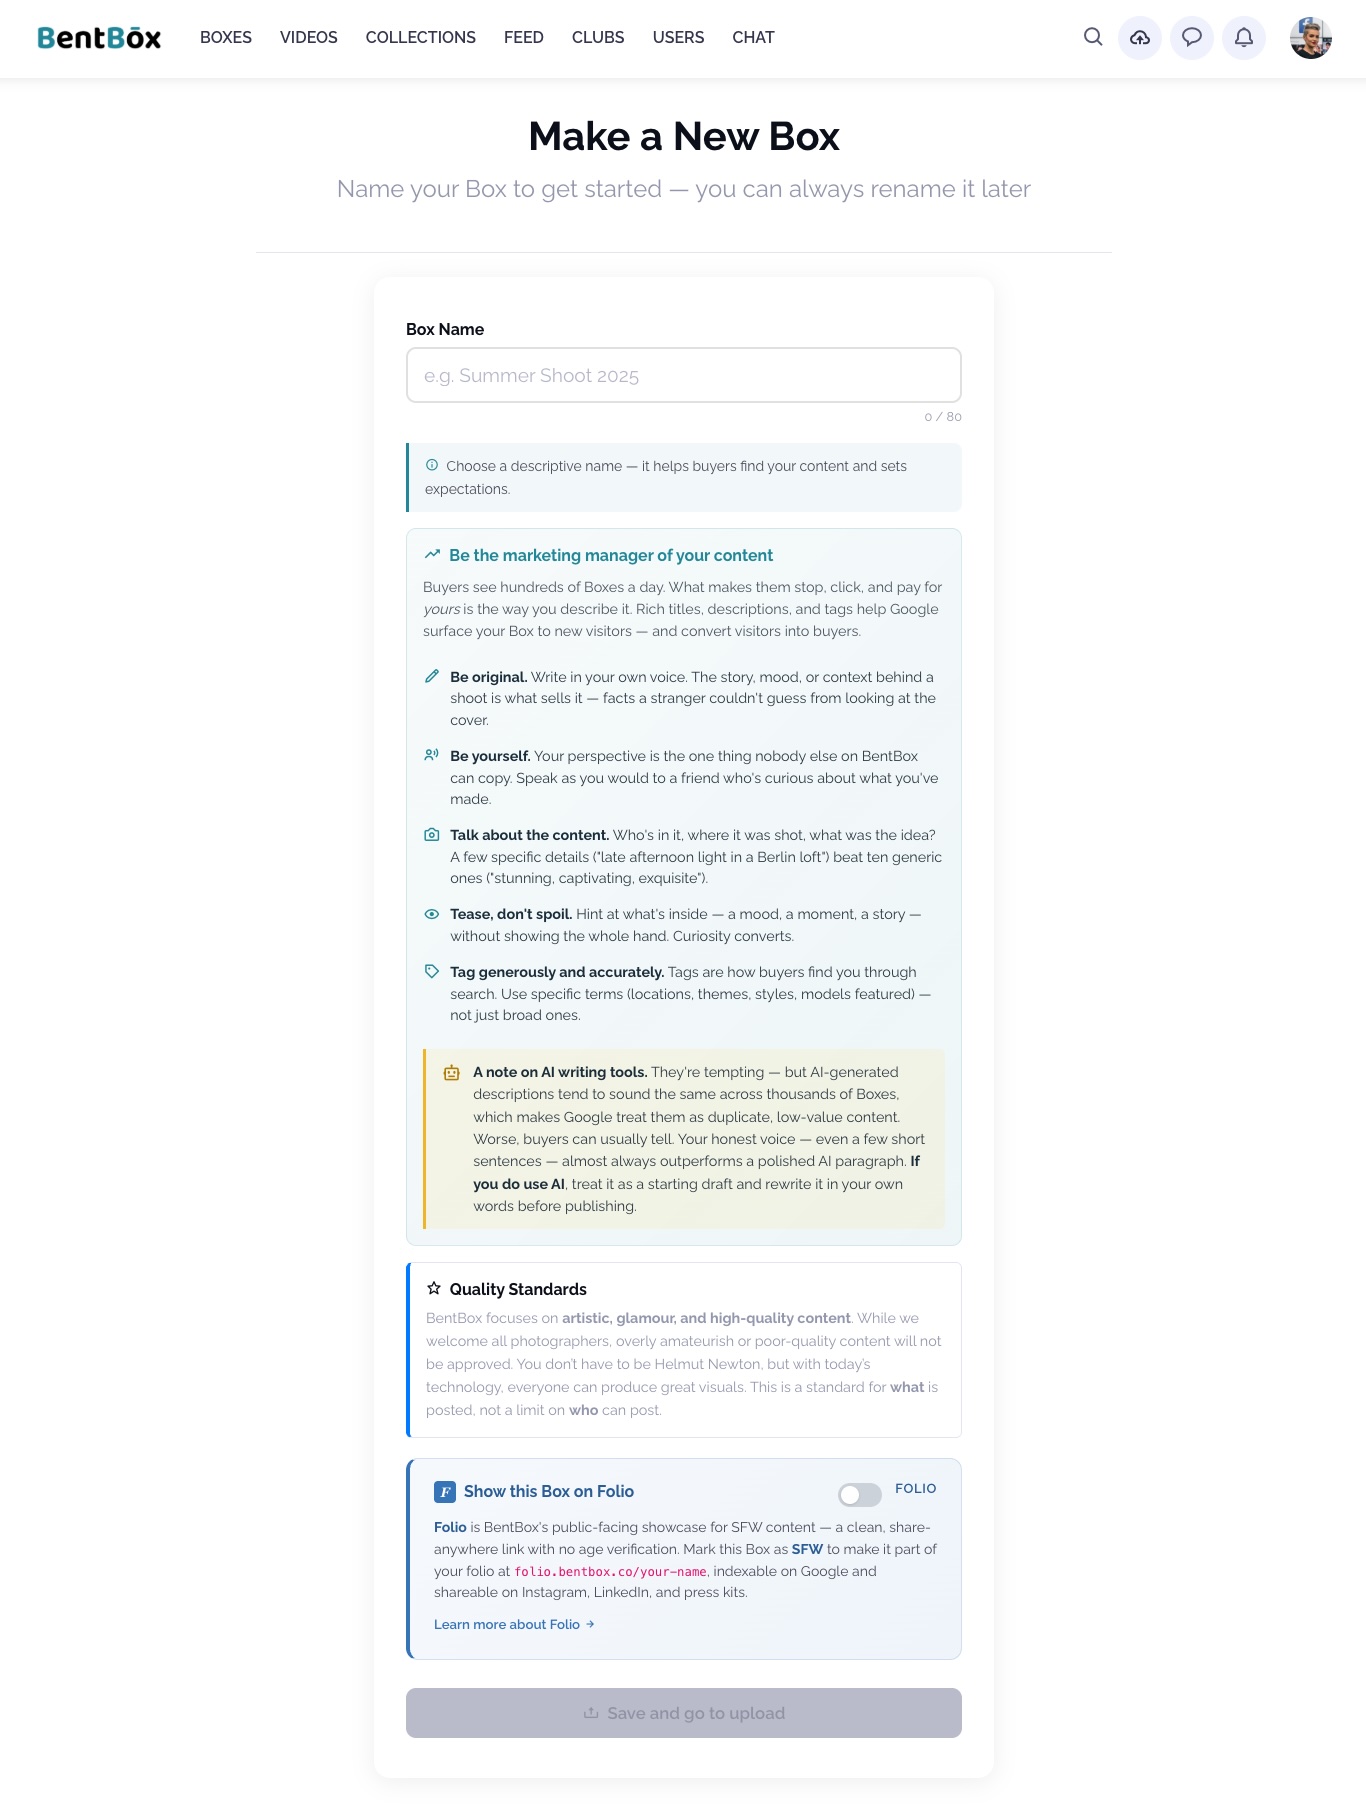
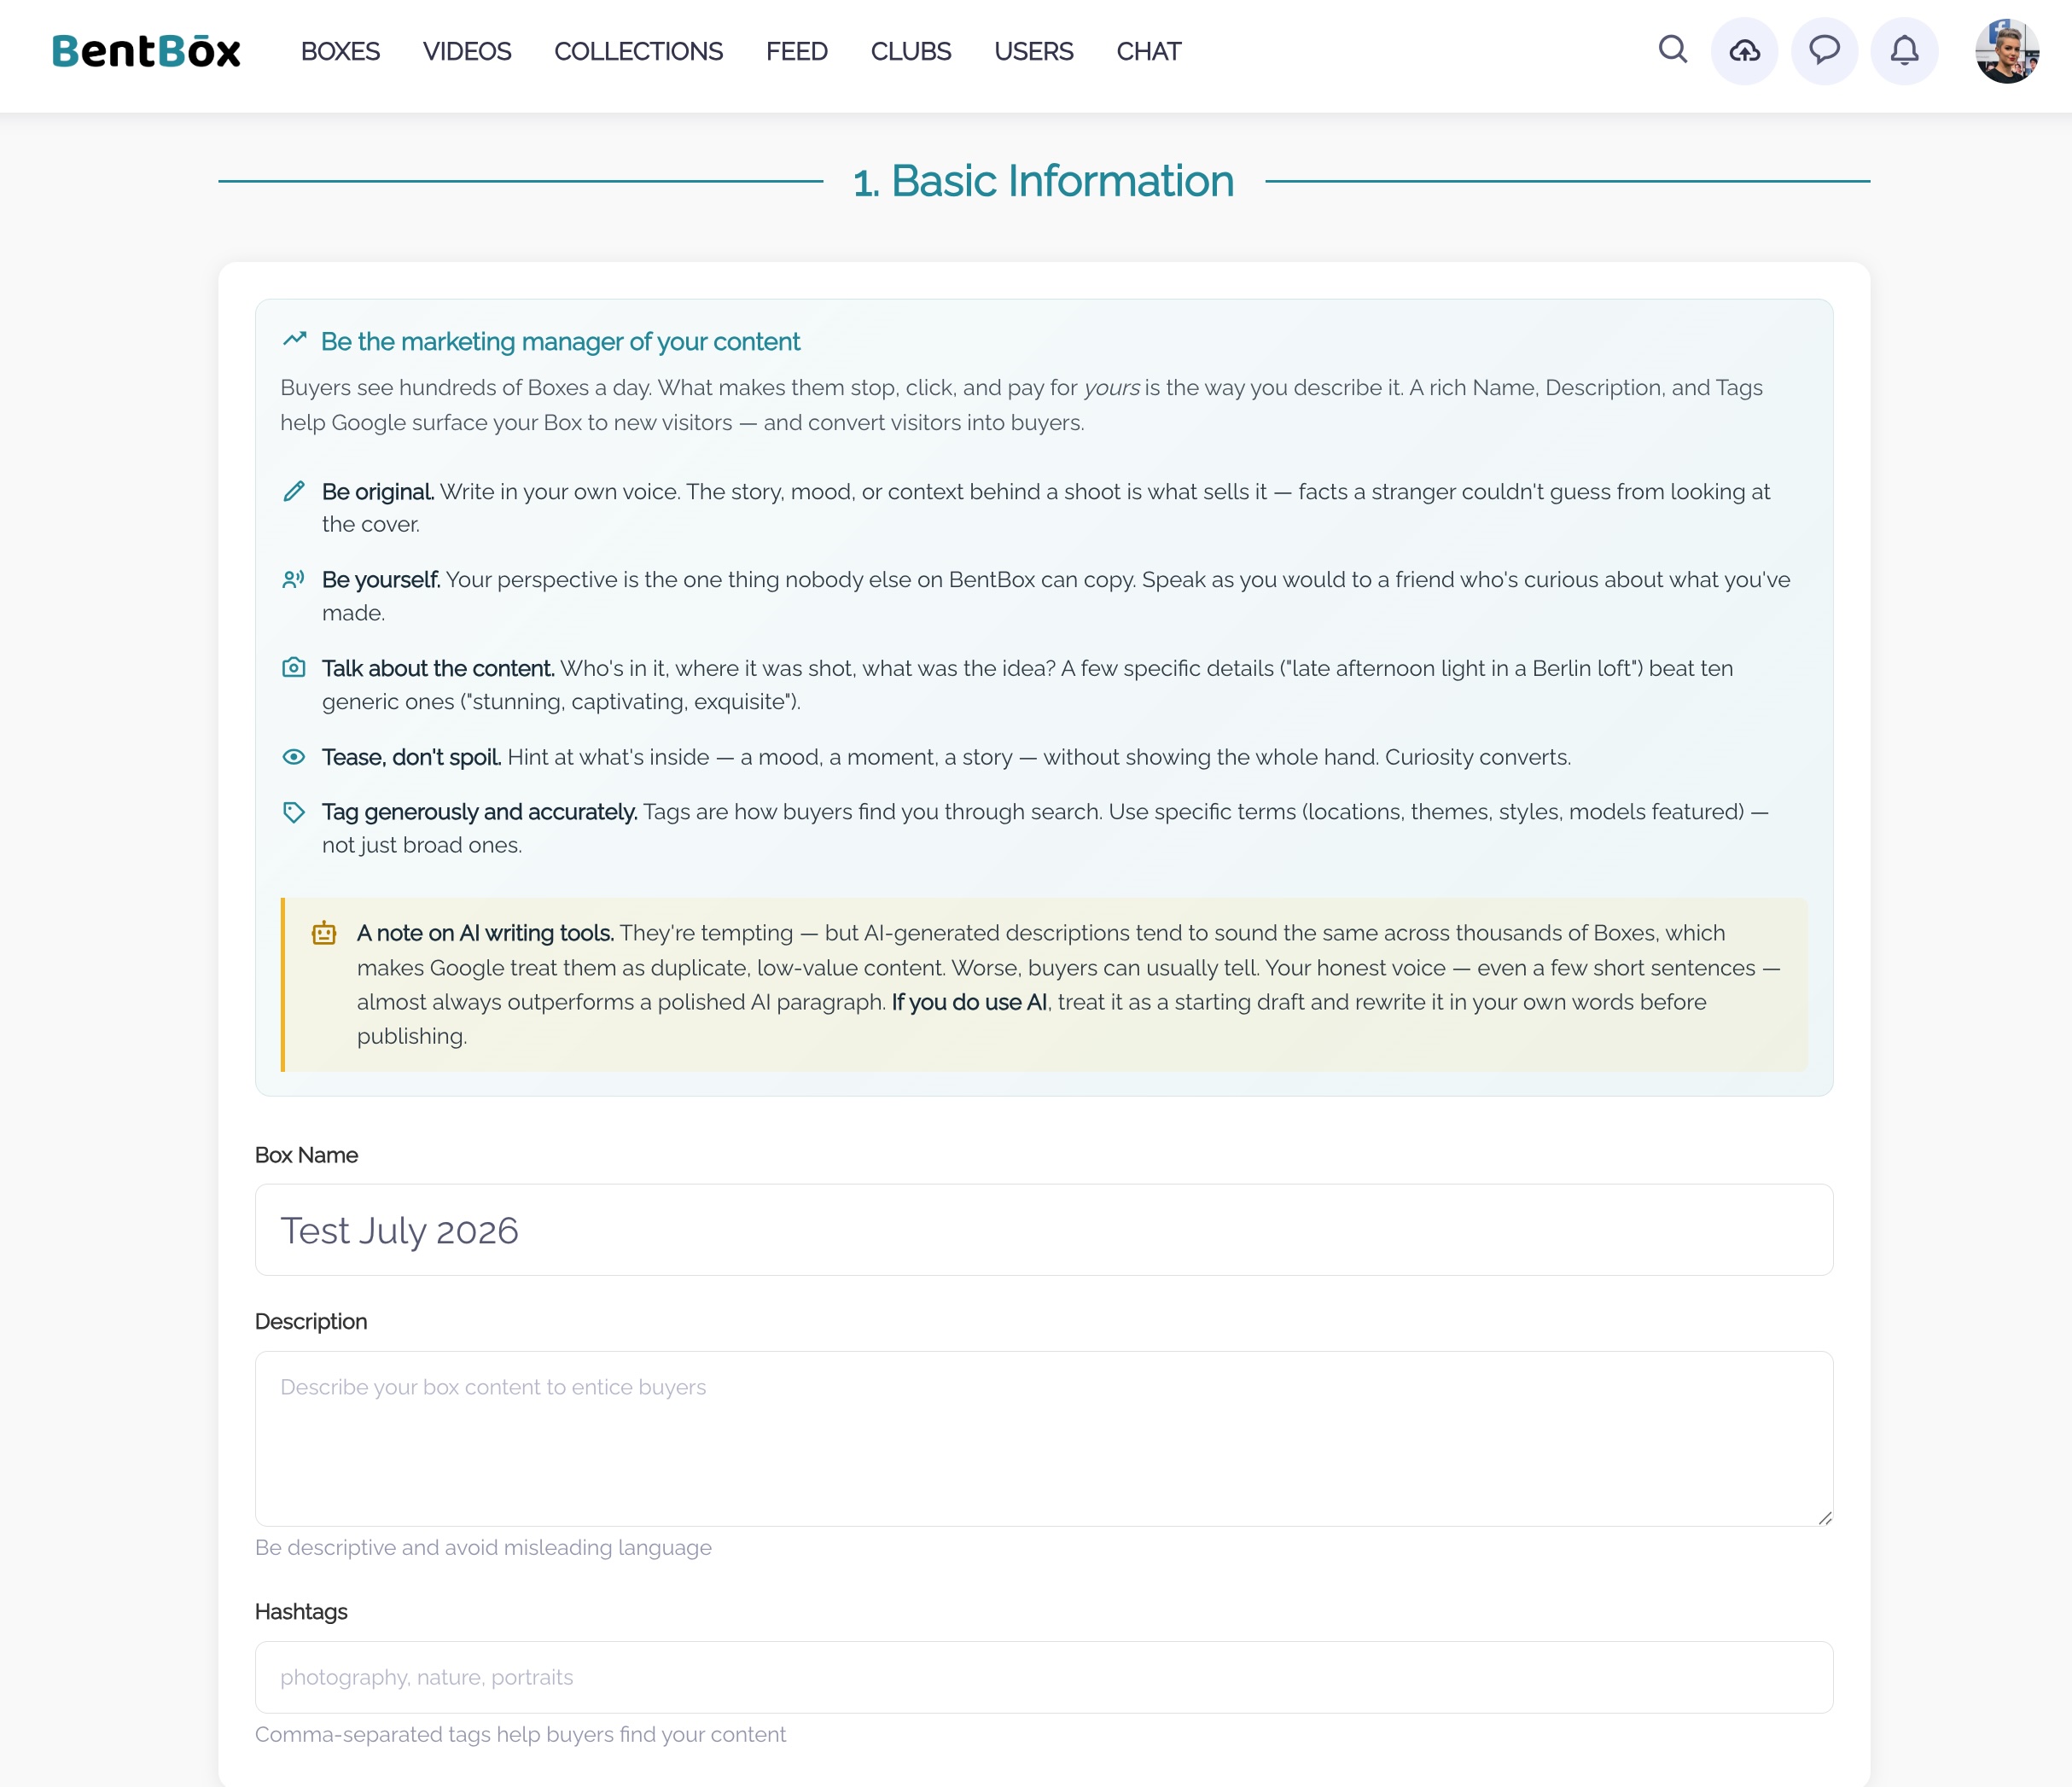
You are redirected to the New Box page. Read the instructions to understand the best way to set up a Box. Select whether the Box is for Folio (SFW) or regular BentBox (NSFW), then give it a name.
A Box is how you sell your photos and videos on BentBox. Here’s the whole process, start to finish — sixteen steps to build one, price it, and get it live.
You are redirected to the New Box page. Read the instructions to understand the best way to set up a Box. Select whether the Box is for Folio (SFW) or regular BentBox (NSFW), then give it a name.
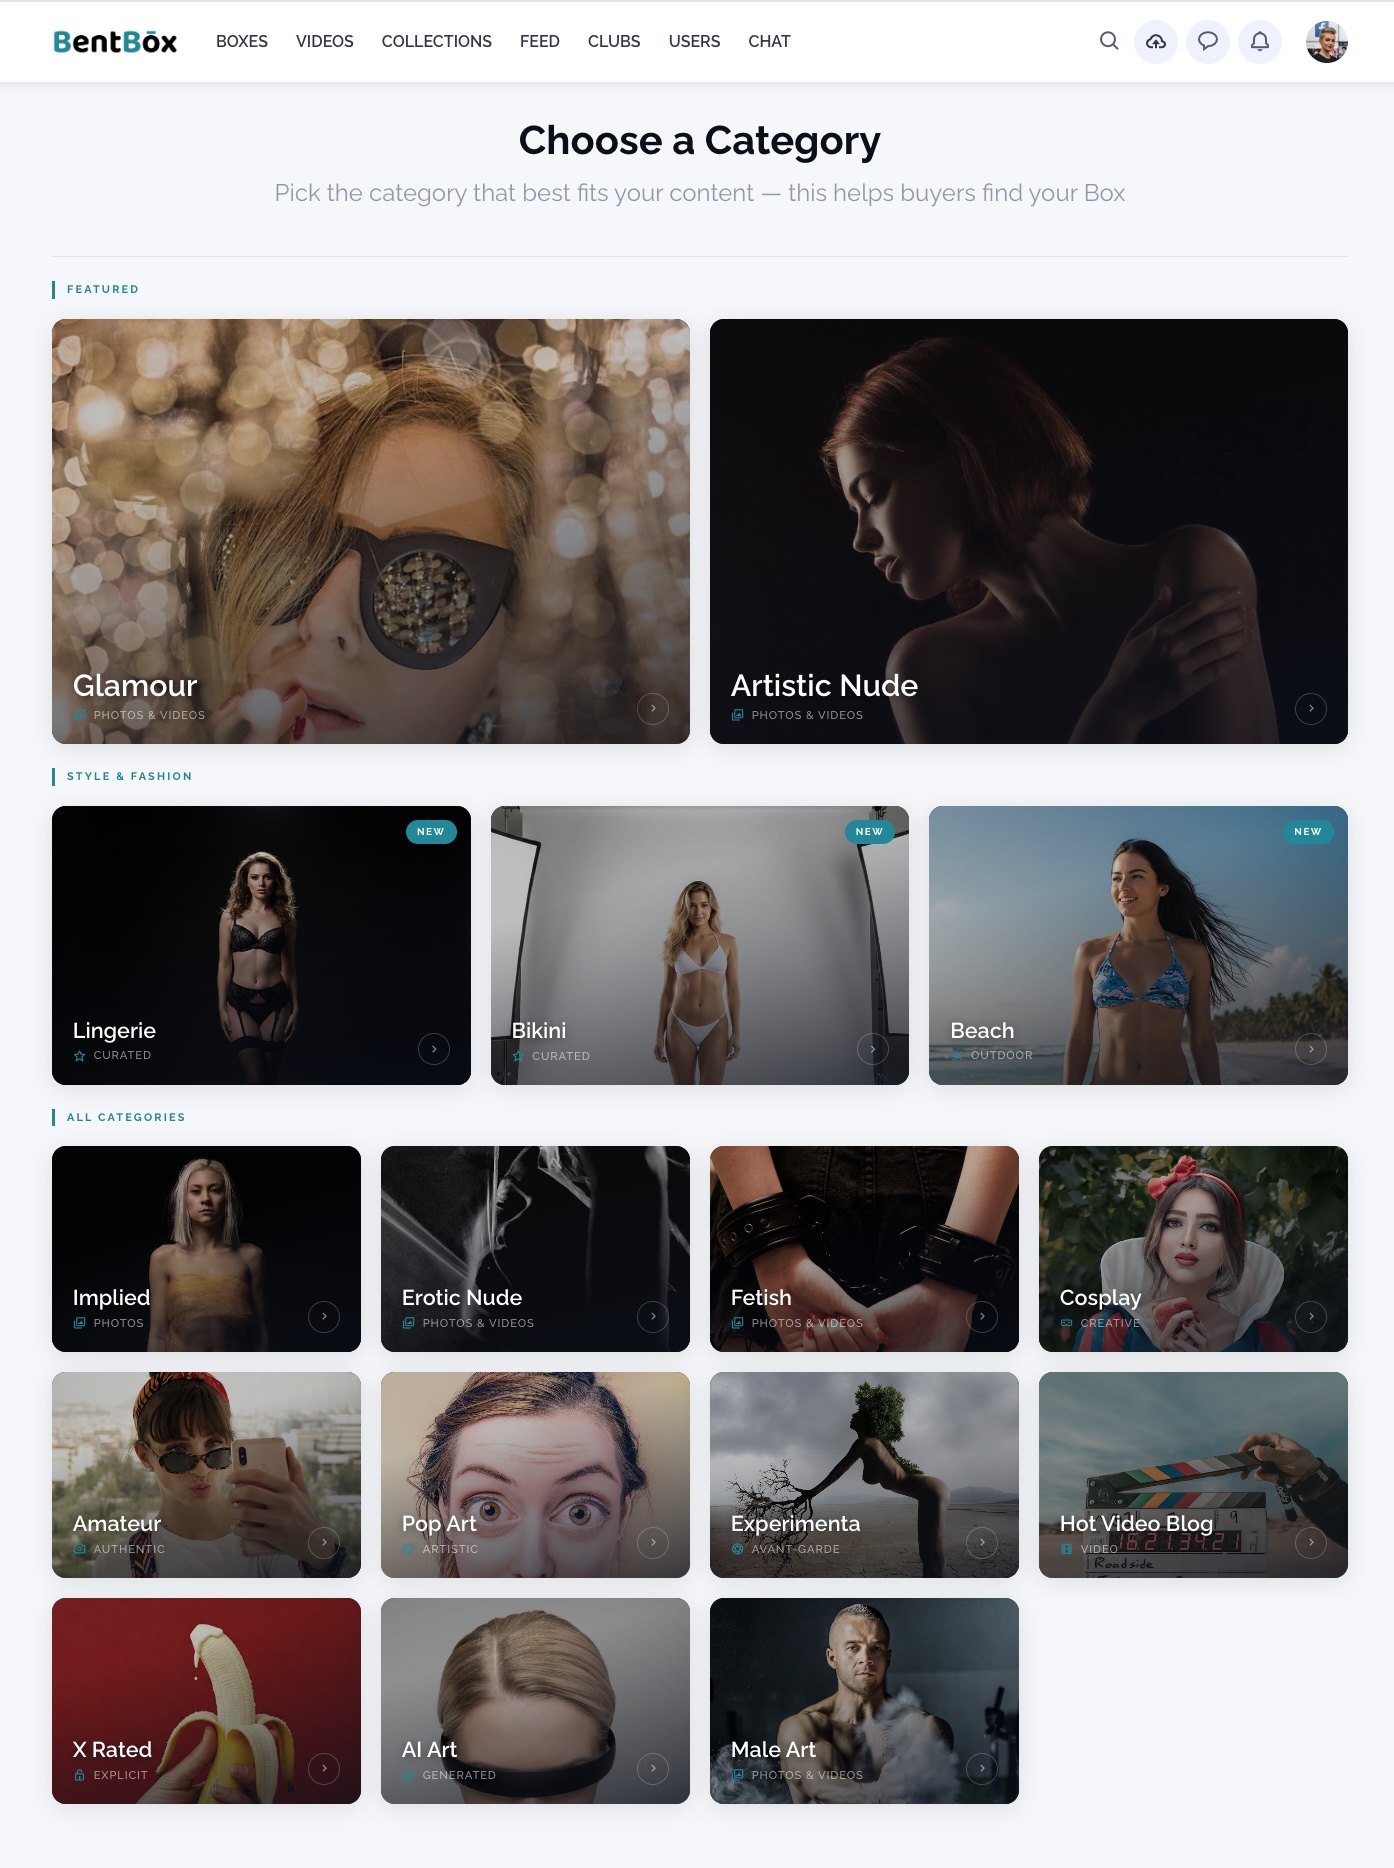
Select the category that best fits your Box, then click Continue at the bottom of the page.
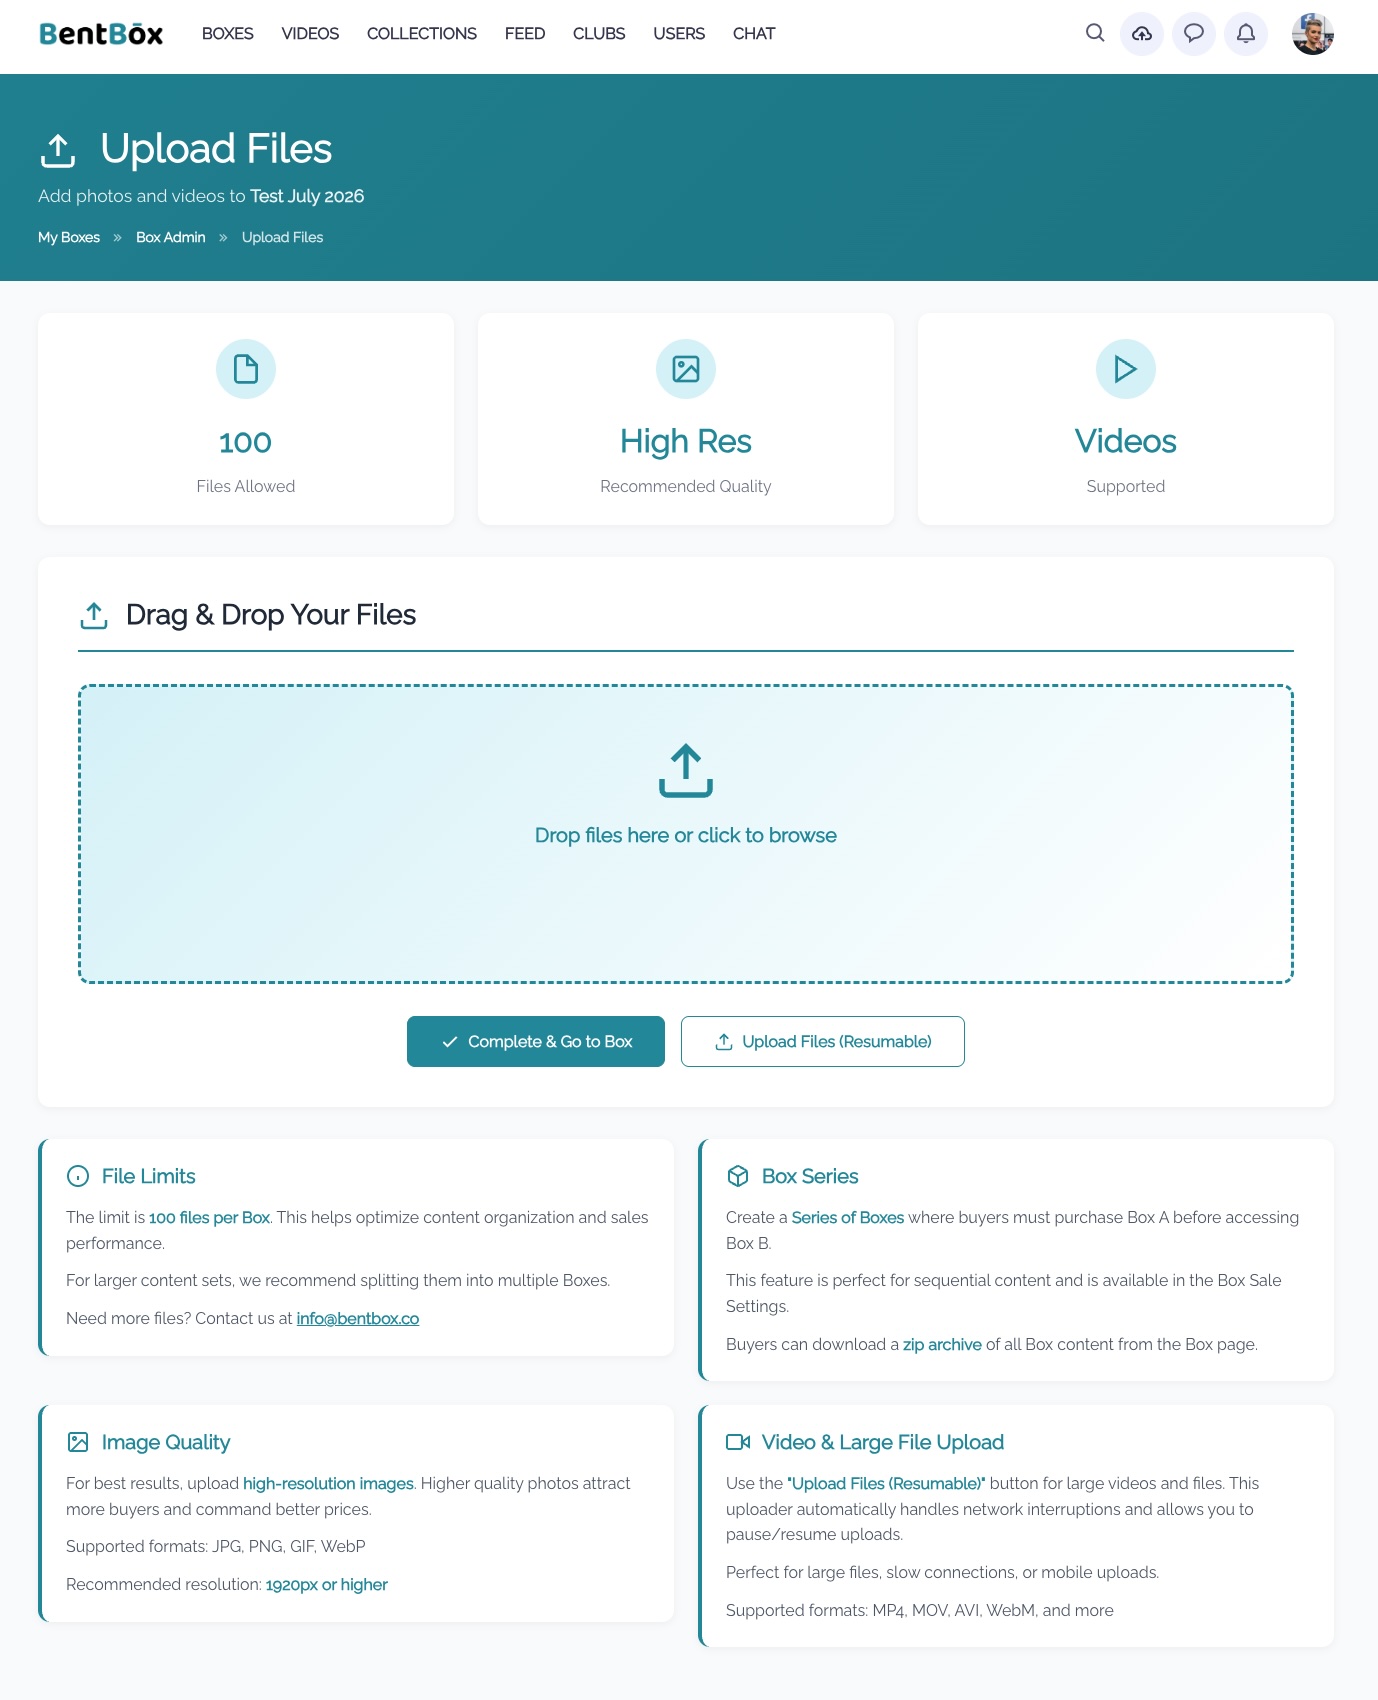
Drag and drop your files, or click the upload area to select them. Once the upload is complete, click Complete & Go to Box.
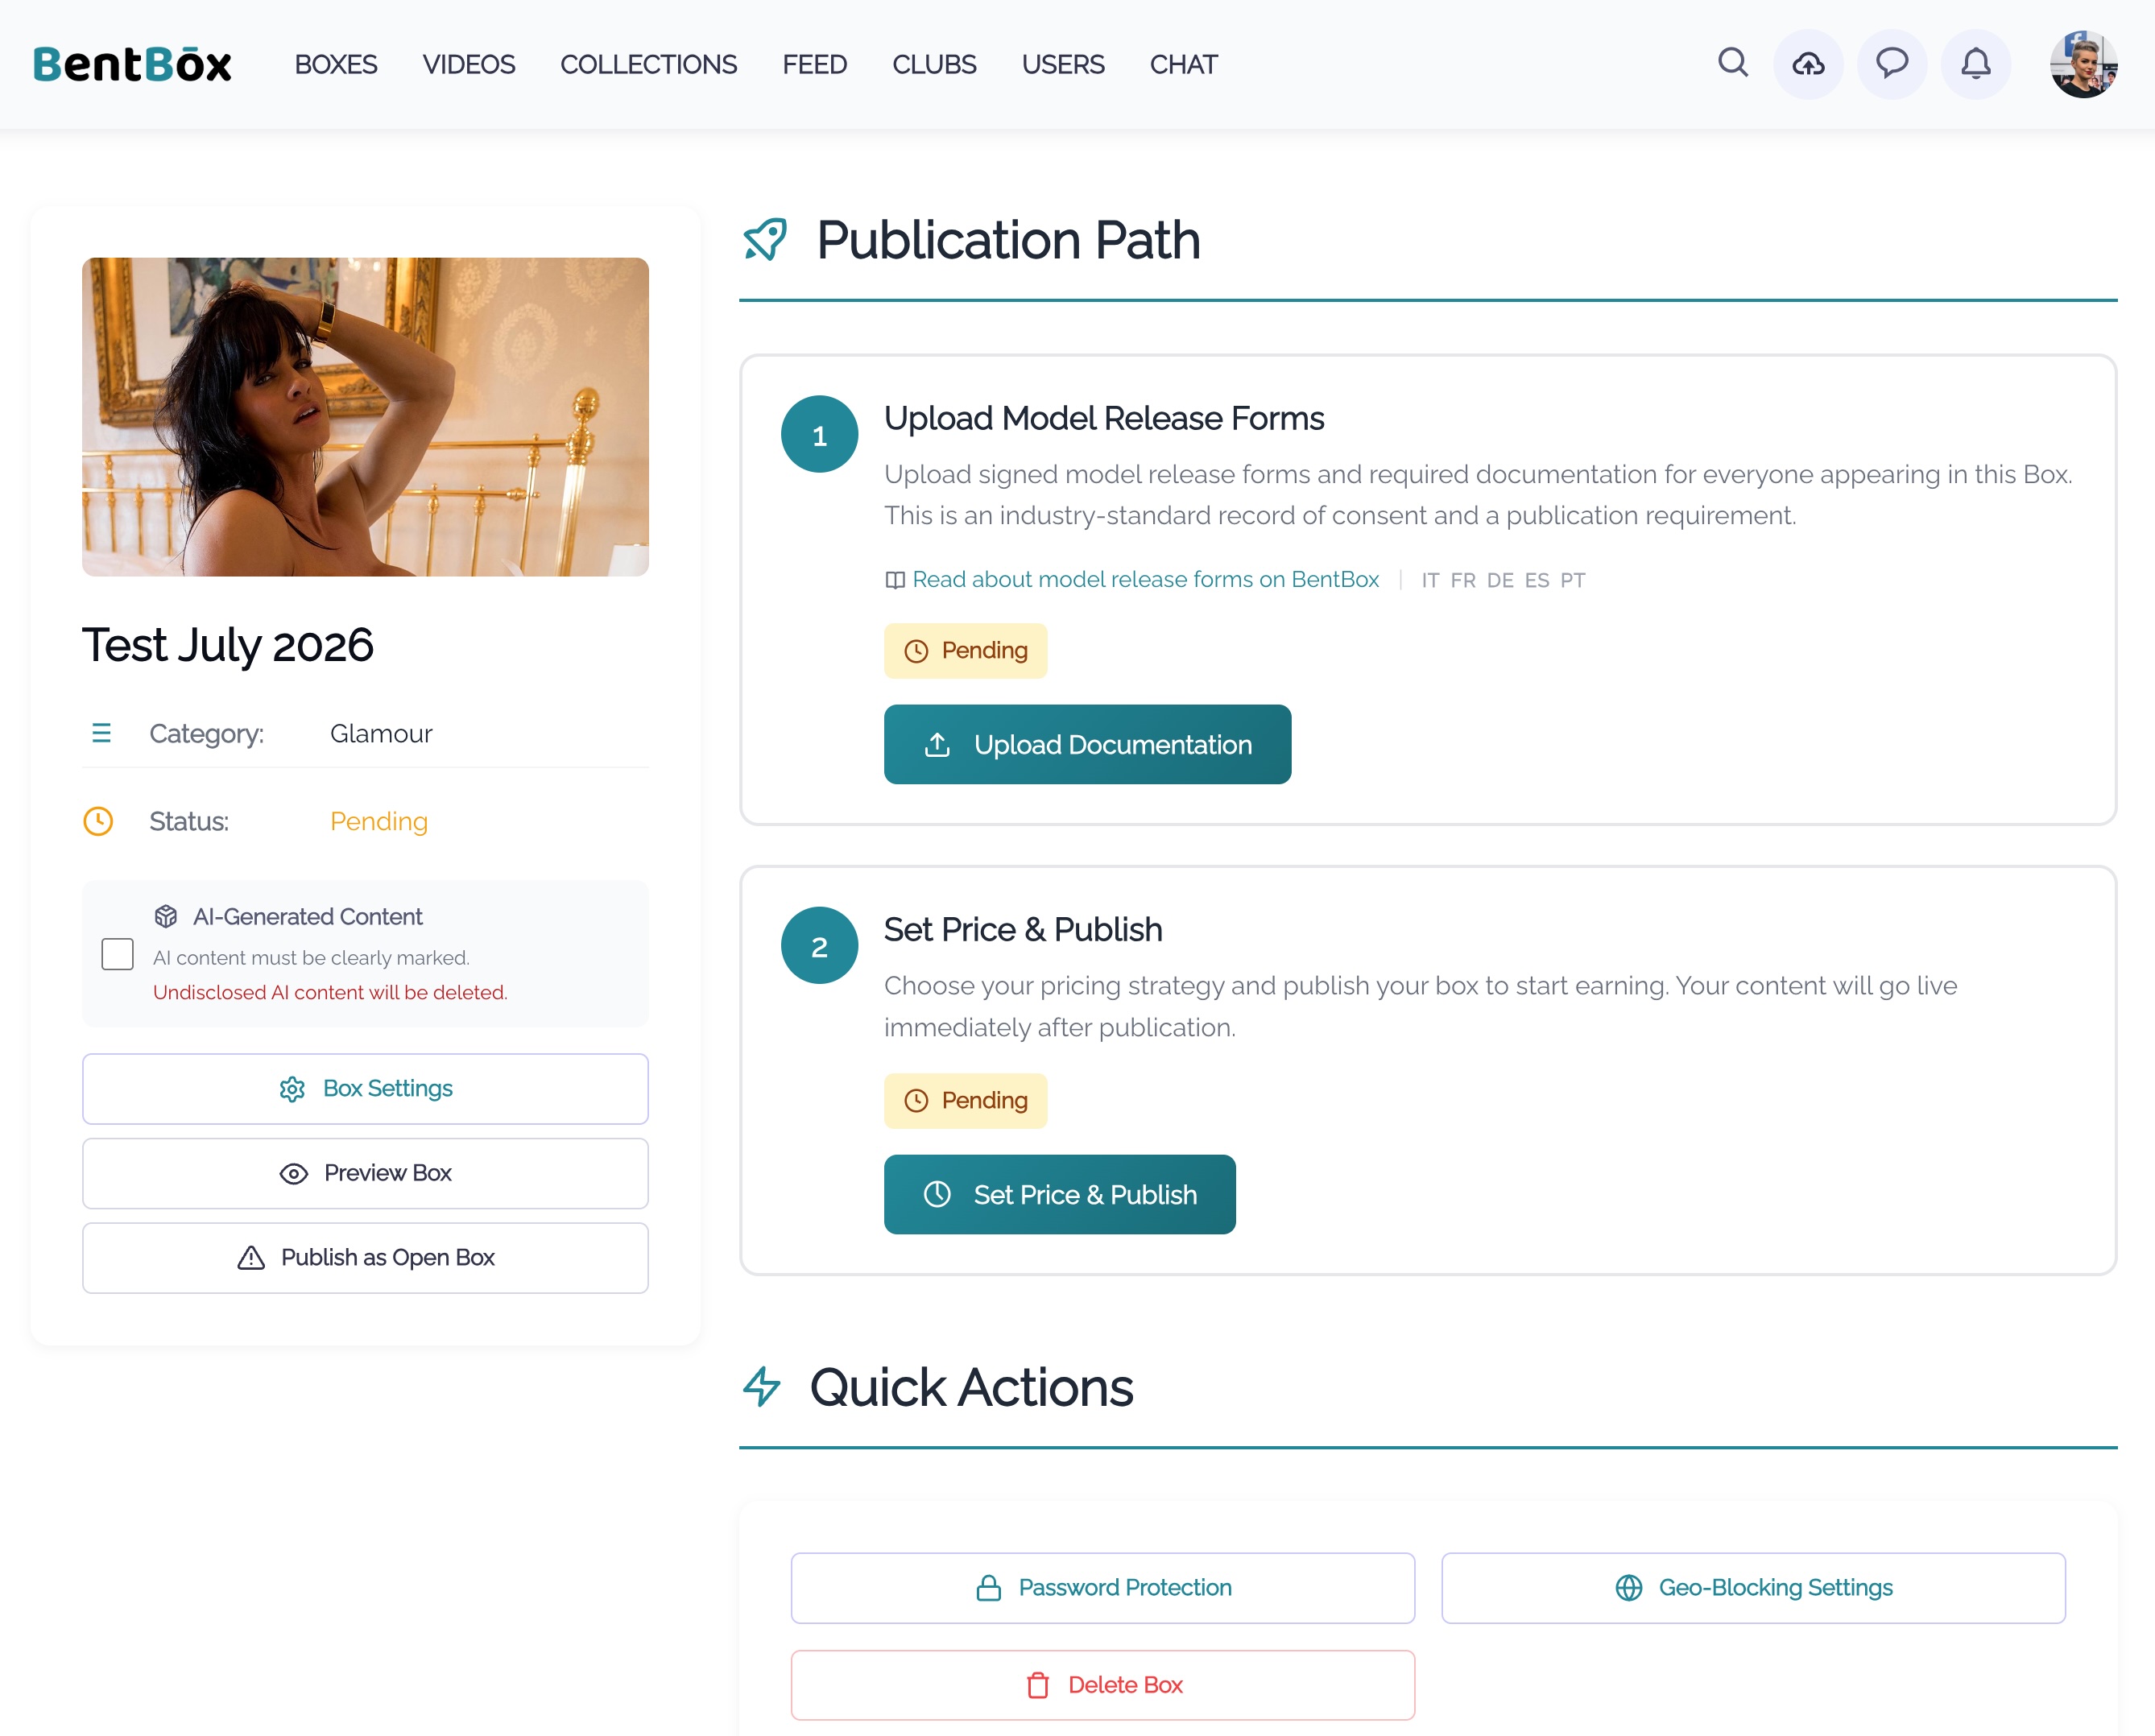
You are redirected to the Box Admin page, where you manage everything about your Box. Upload the model release form or confirm that you are the only performer, then click Set Price & Publish to complete publication. You can review the contents of your Box and manage the cover image using the top-right menu on each image. Click Box Settings to change the Box’s basic configuration — set a password (if needed), configure Geo Blocking, or delete your Box or individual files.
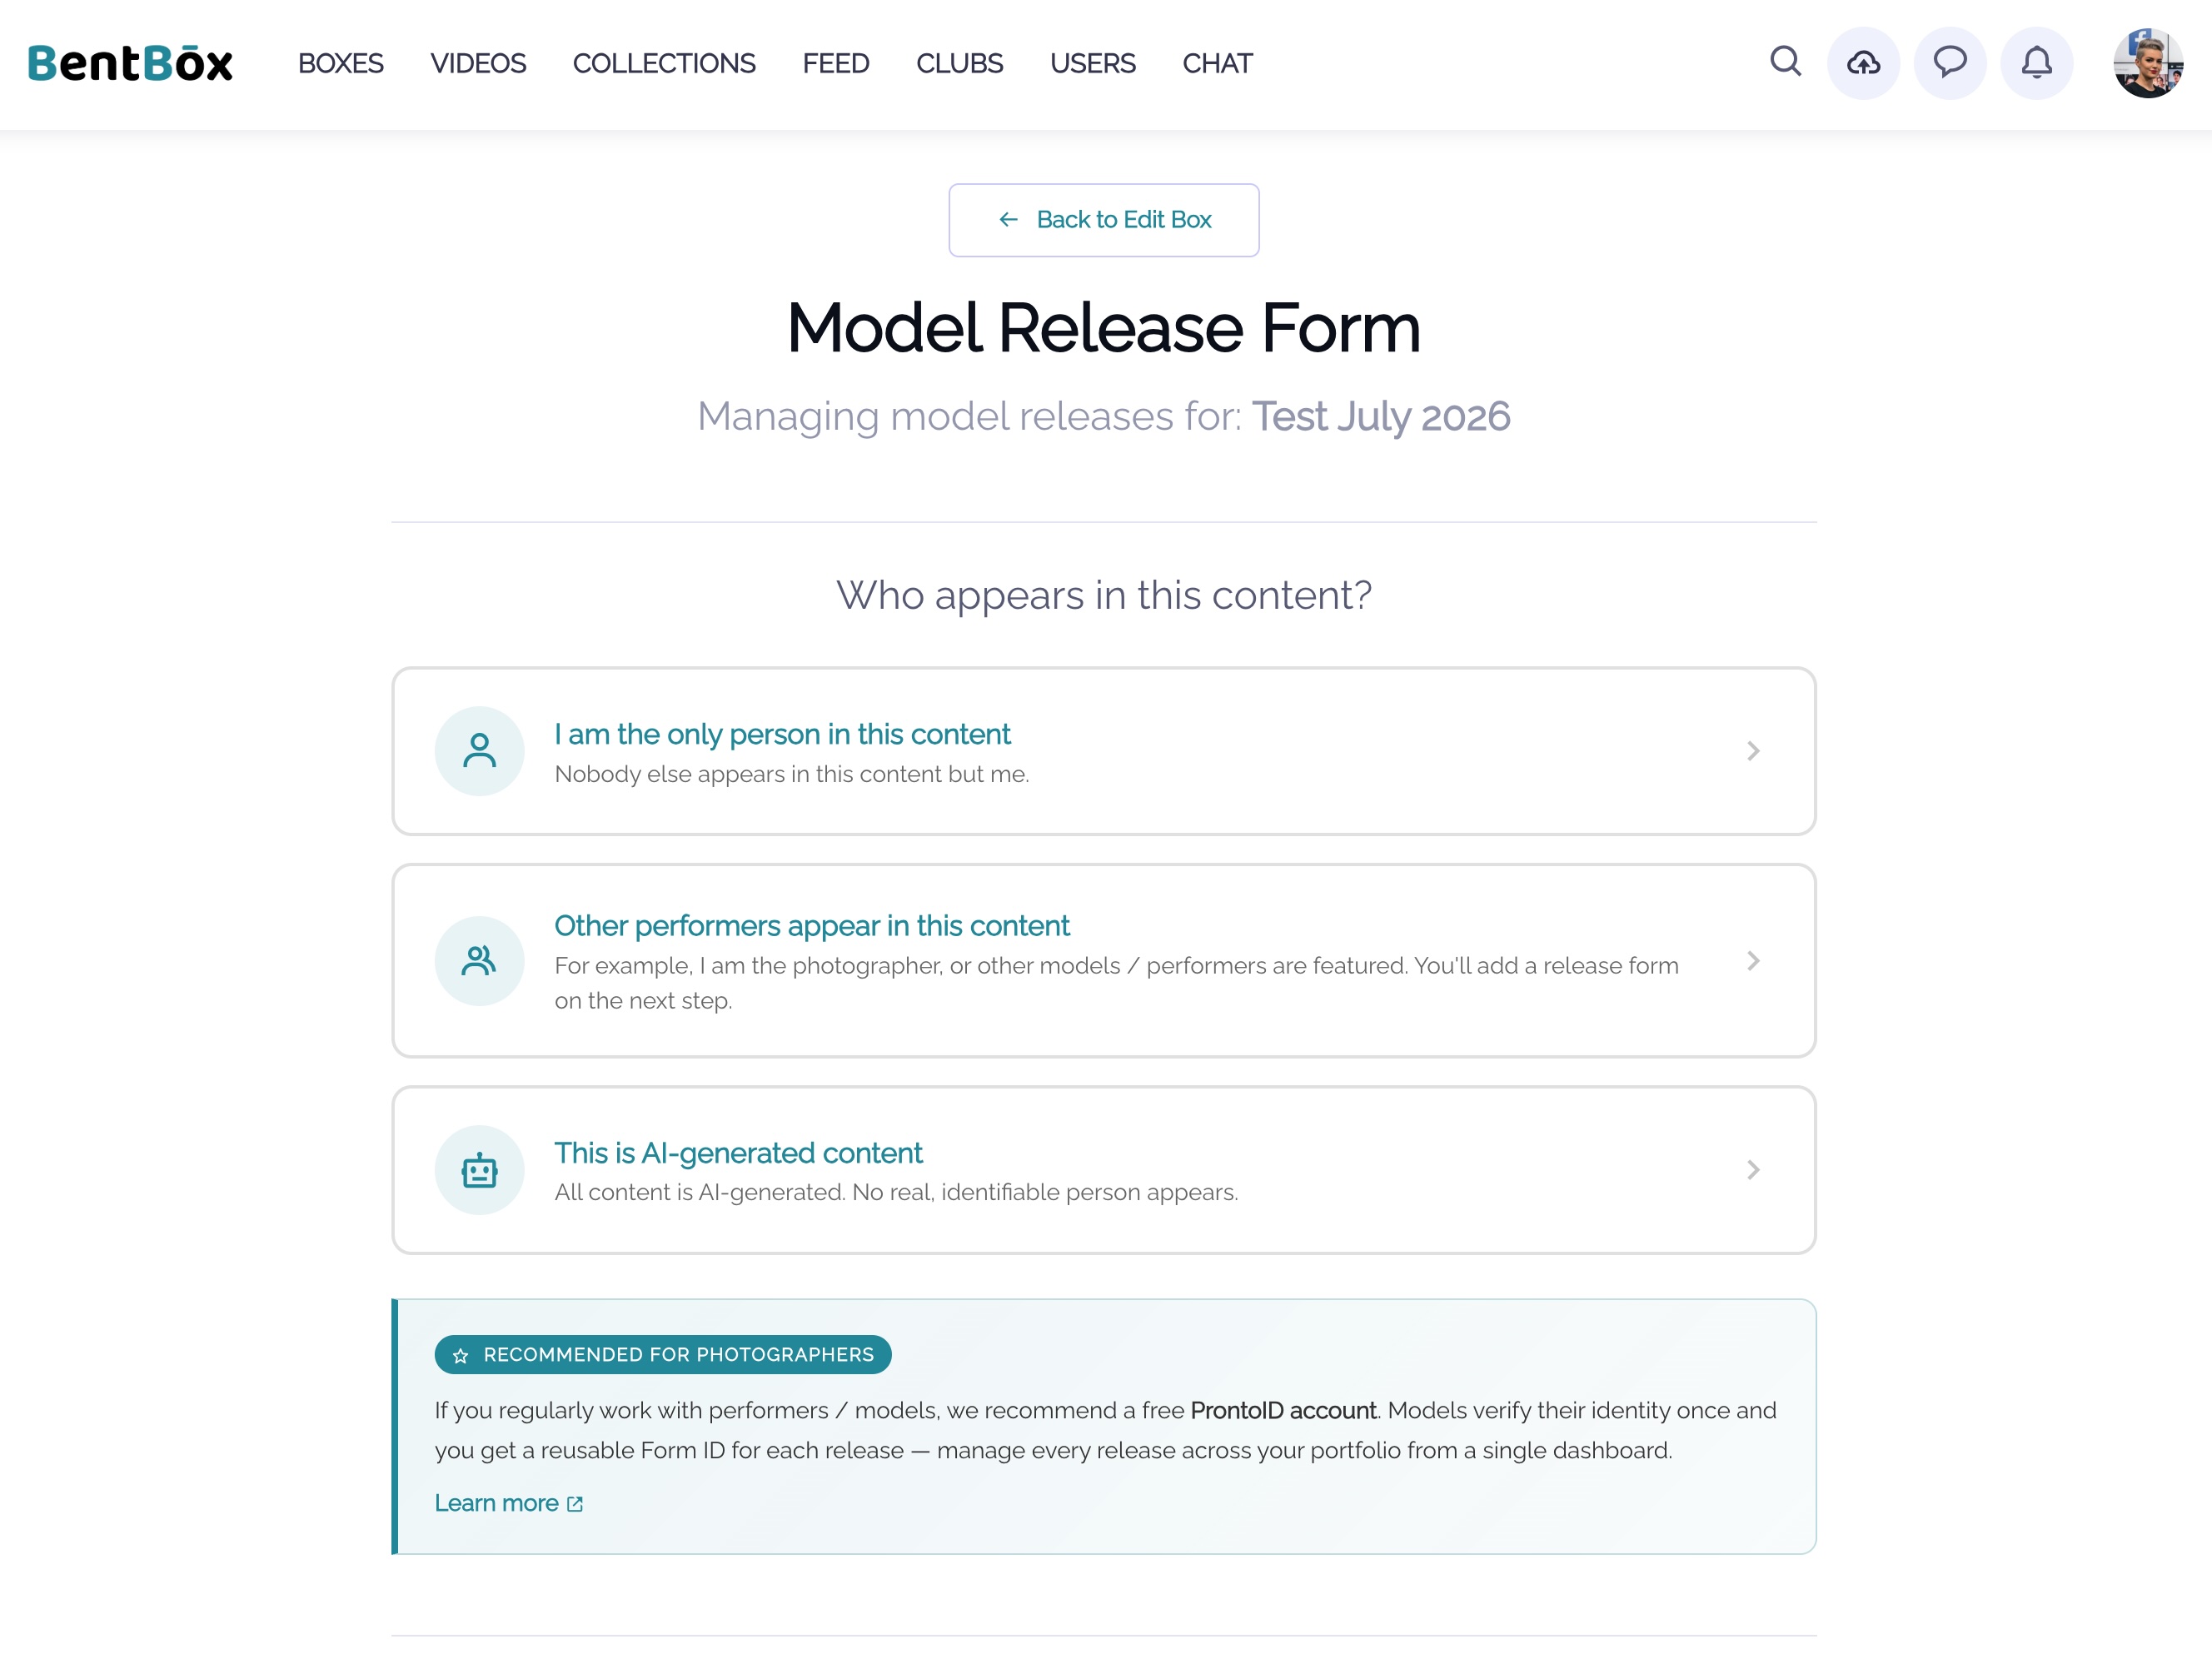
When you click Upload Documentation in the model release section, you are taken to a page where you select who appears in the content: (1) only you, (2) other people and performers, or (3) AI content. If it is only you or AI, nothing else is needed and the Box can be published. If other performers appear, see the next step.
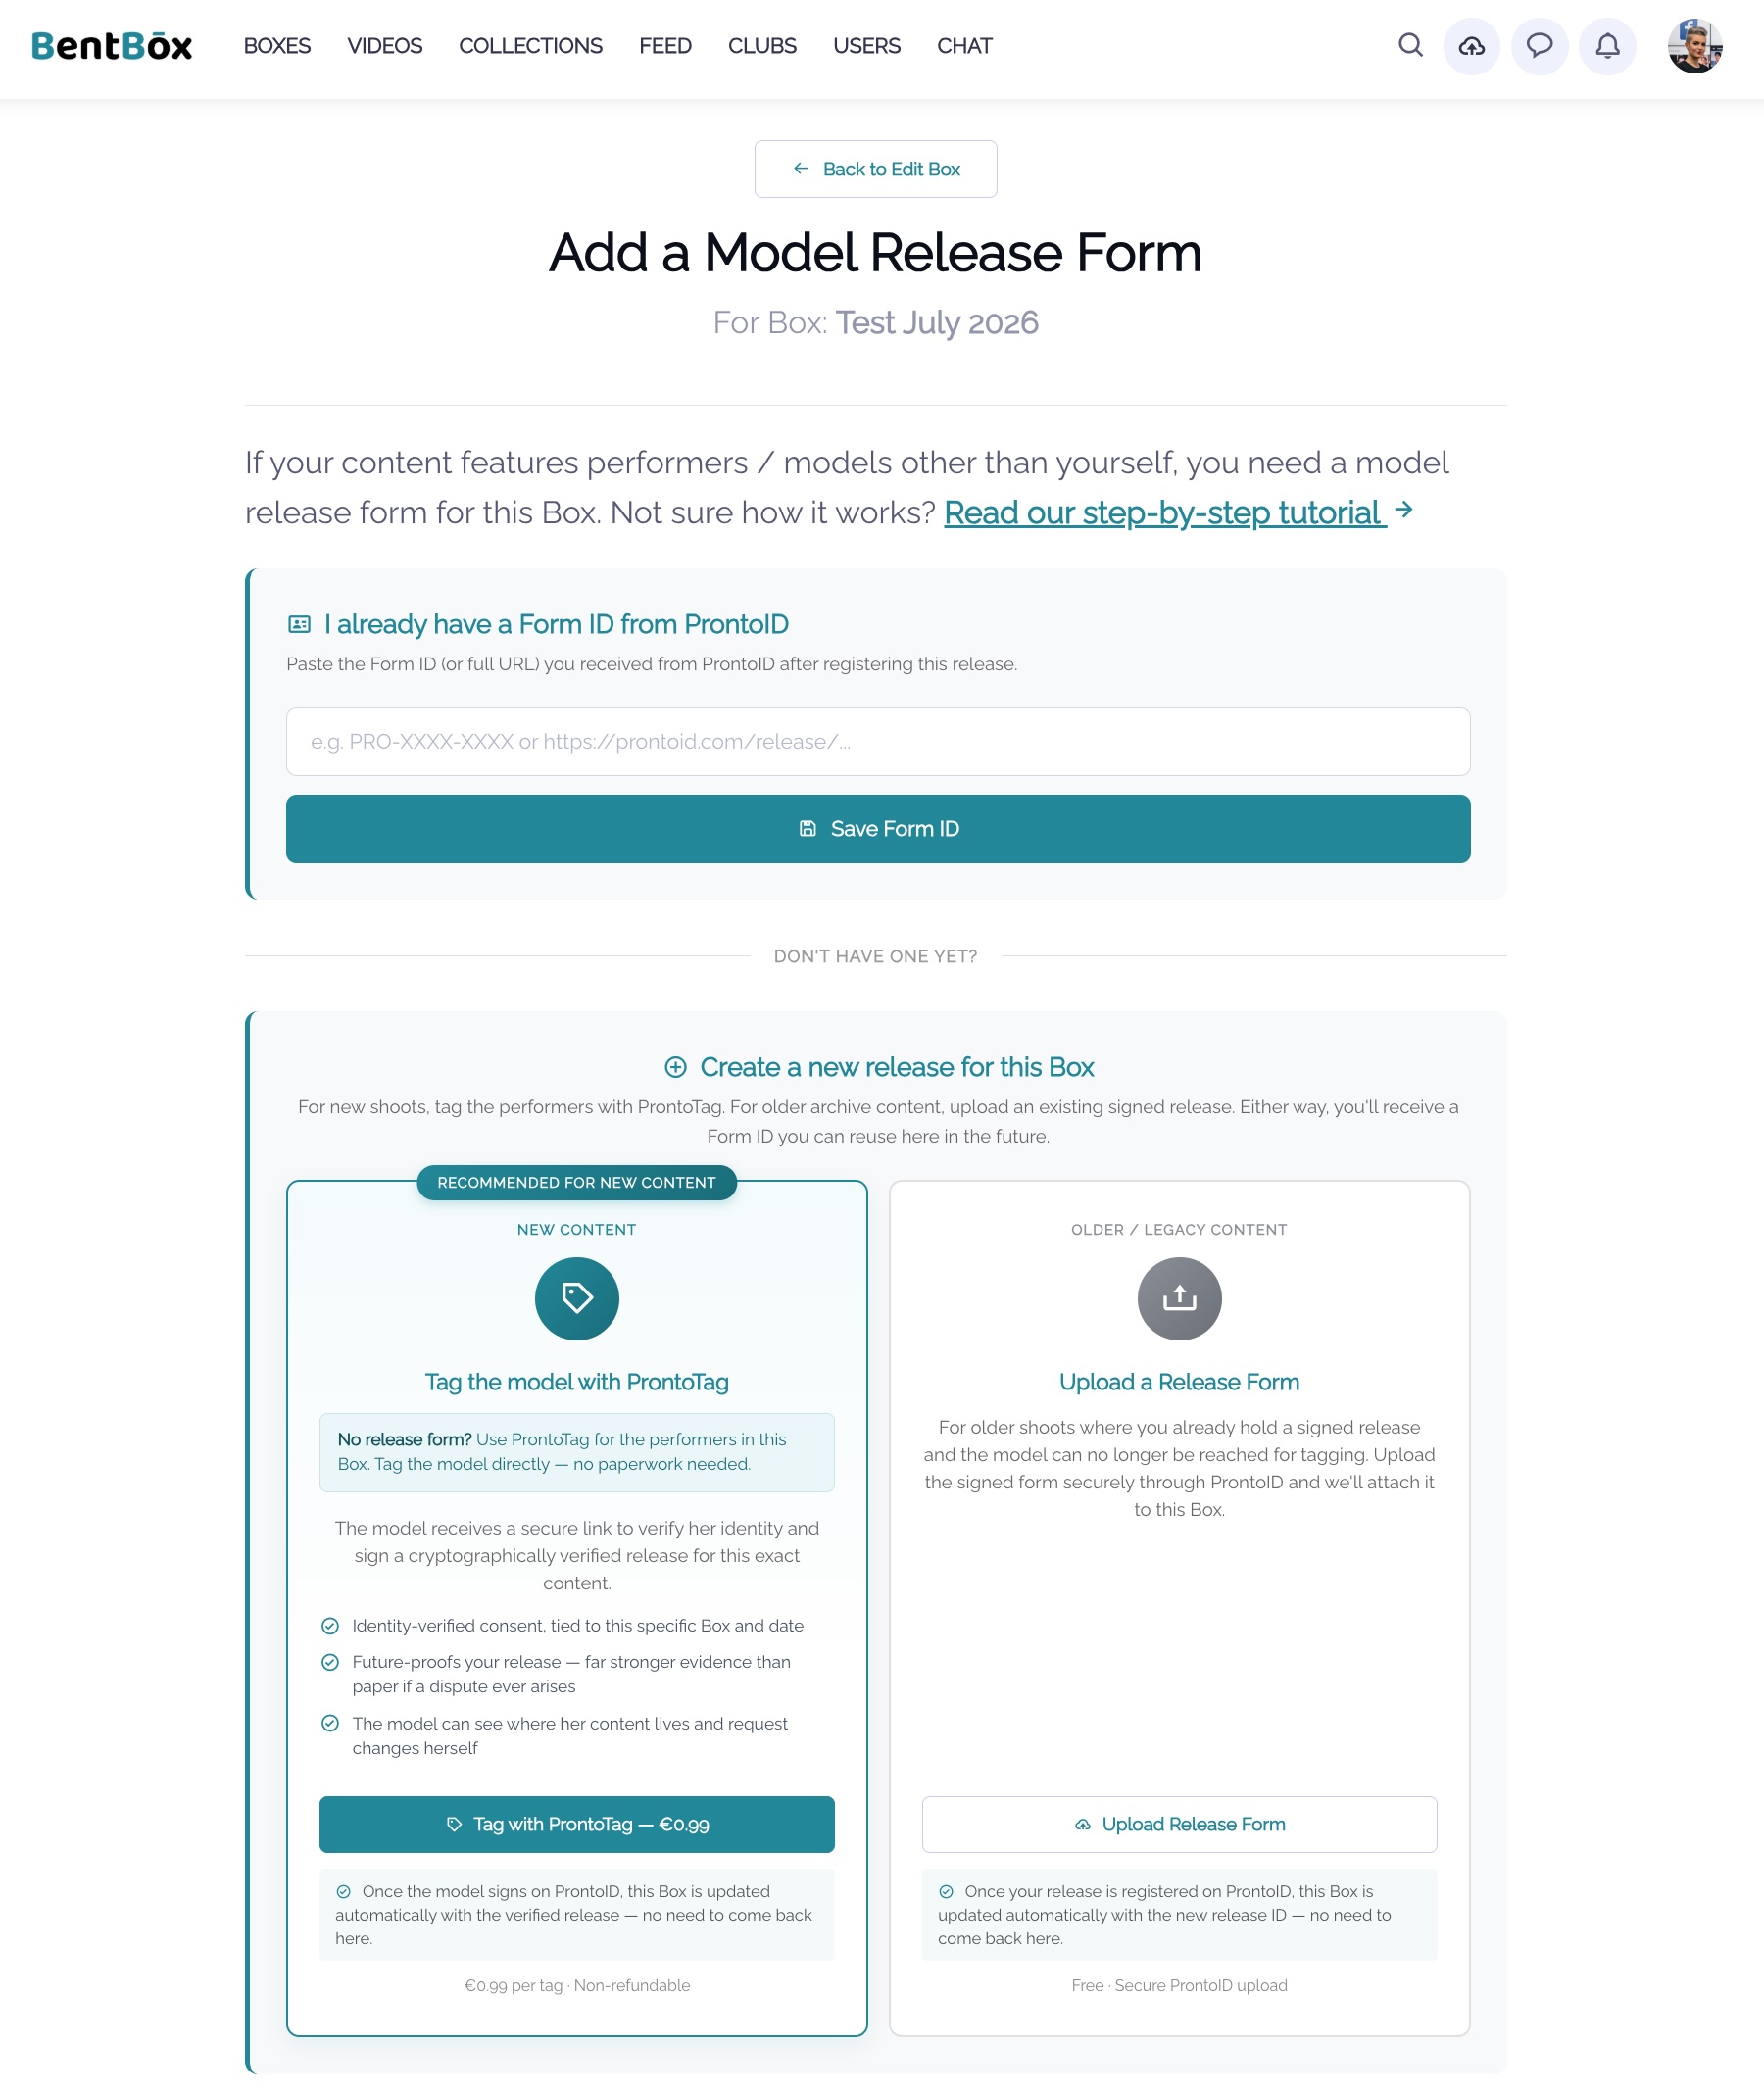
If other performers appear in your content, you have three options. (1) Use a ProntoID release ID, if you manage your releases through ProntoID. We recommend ProntoID — it is a free app that gives you all the tools to manage releases effectively. (2) Add a scanned release form on the fly, managed through ProntoID for full 2257 and GDPR compliance. (3) If you do not have a release form, use ProntoID’s ProntoTag service to automatically ask the model to sign off on the content; this service costs €0.99. ProntoTag gives you the strongest consent evidence and helps future-proof your content. If you use a ProntoID reference or upload a scanned release form, the process is complete and you can publish your Box. For ProntoTag, see the next steps.

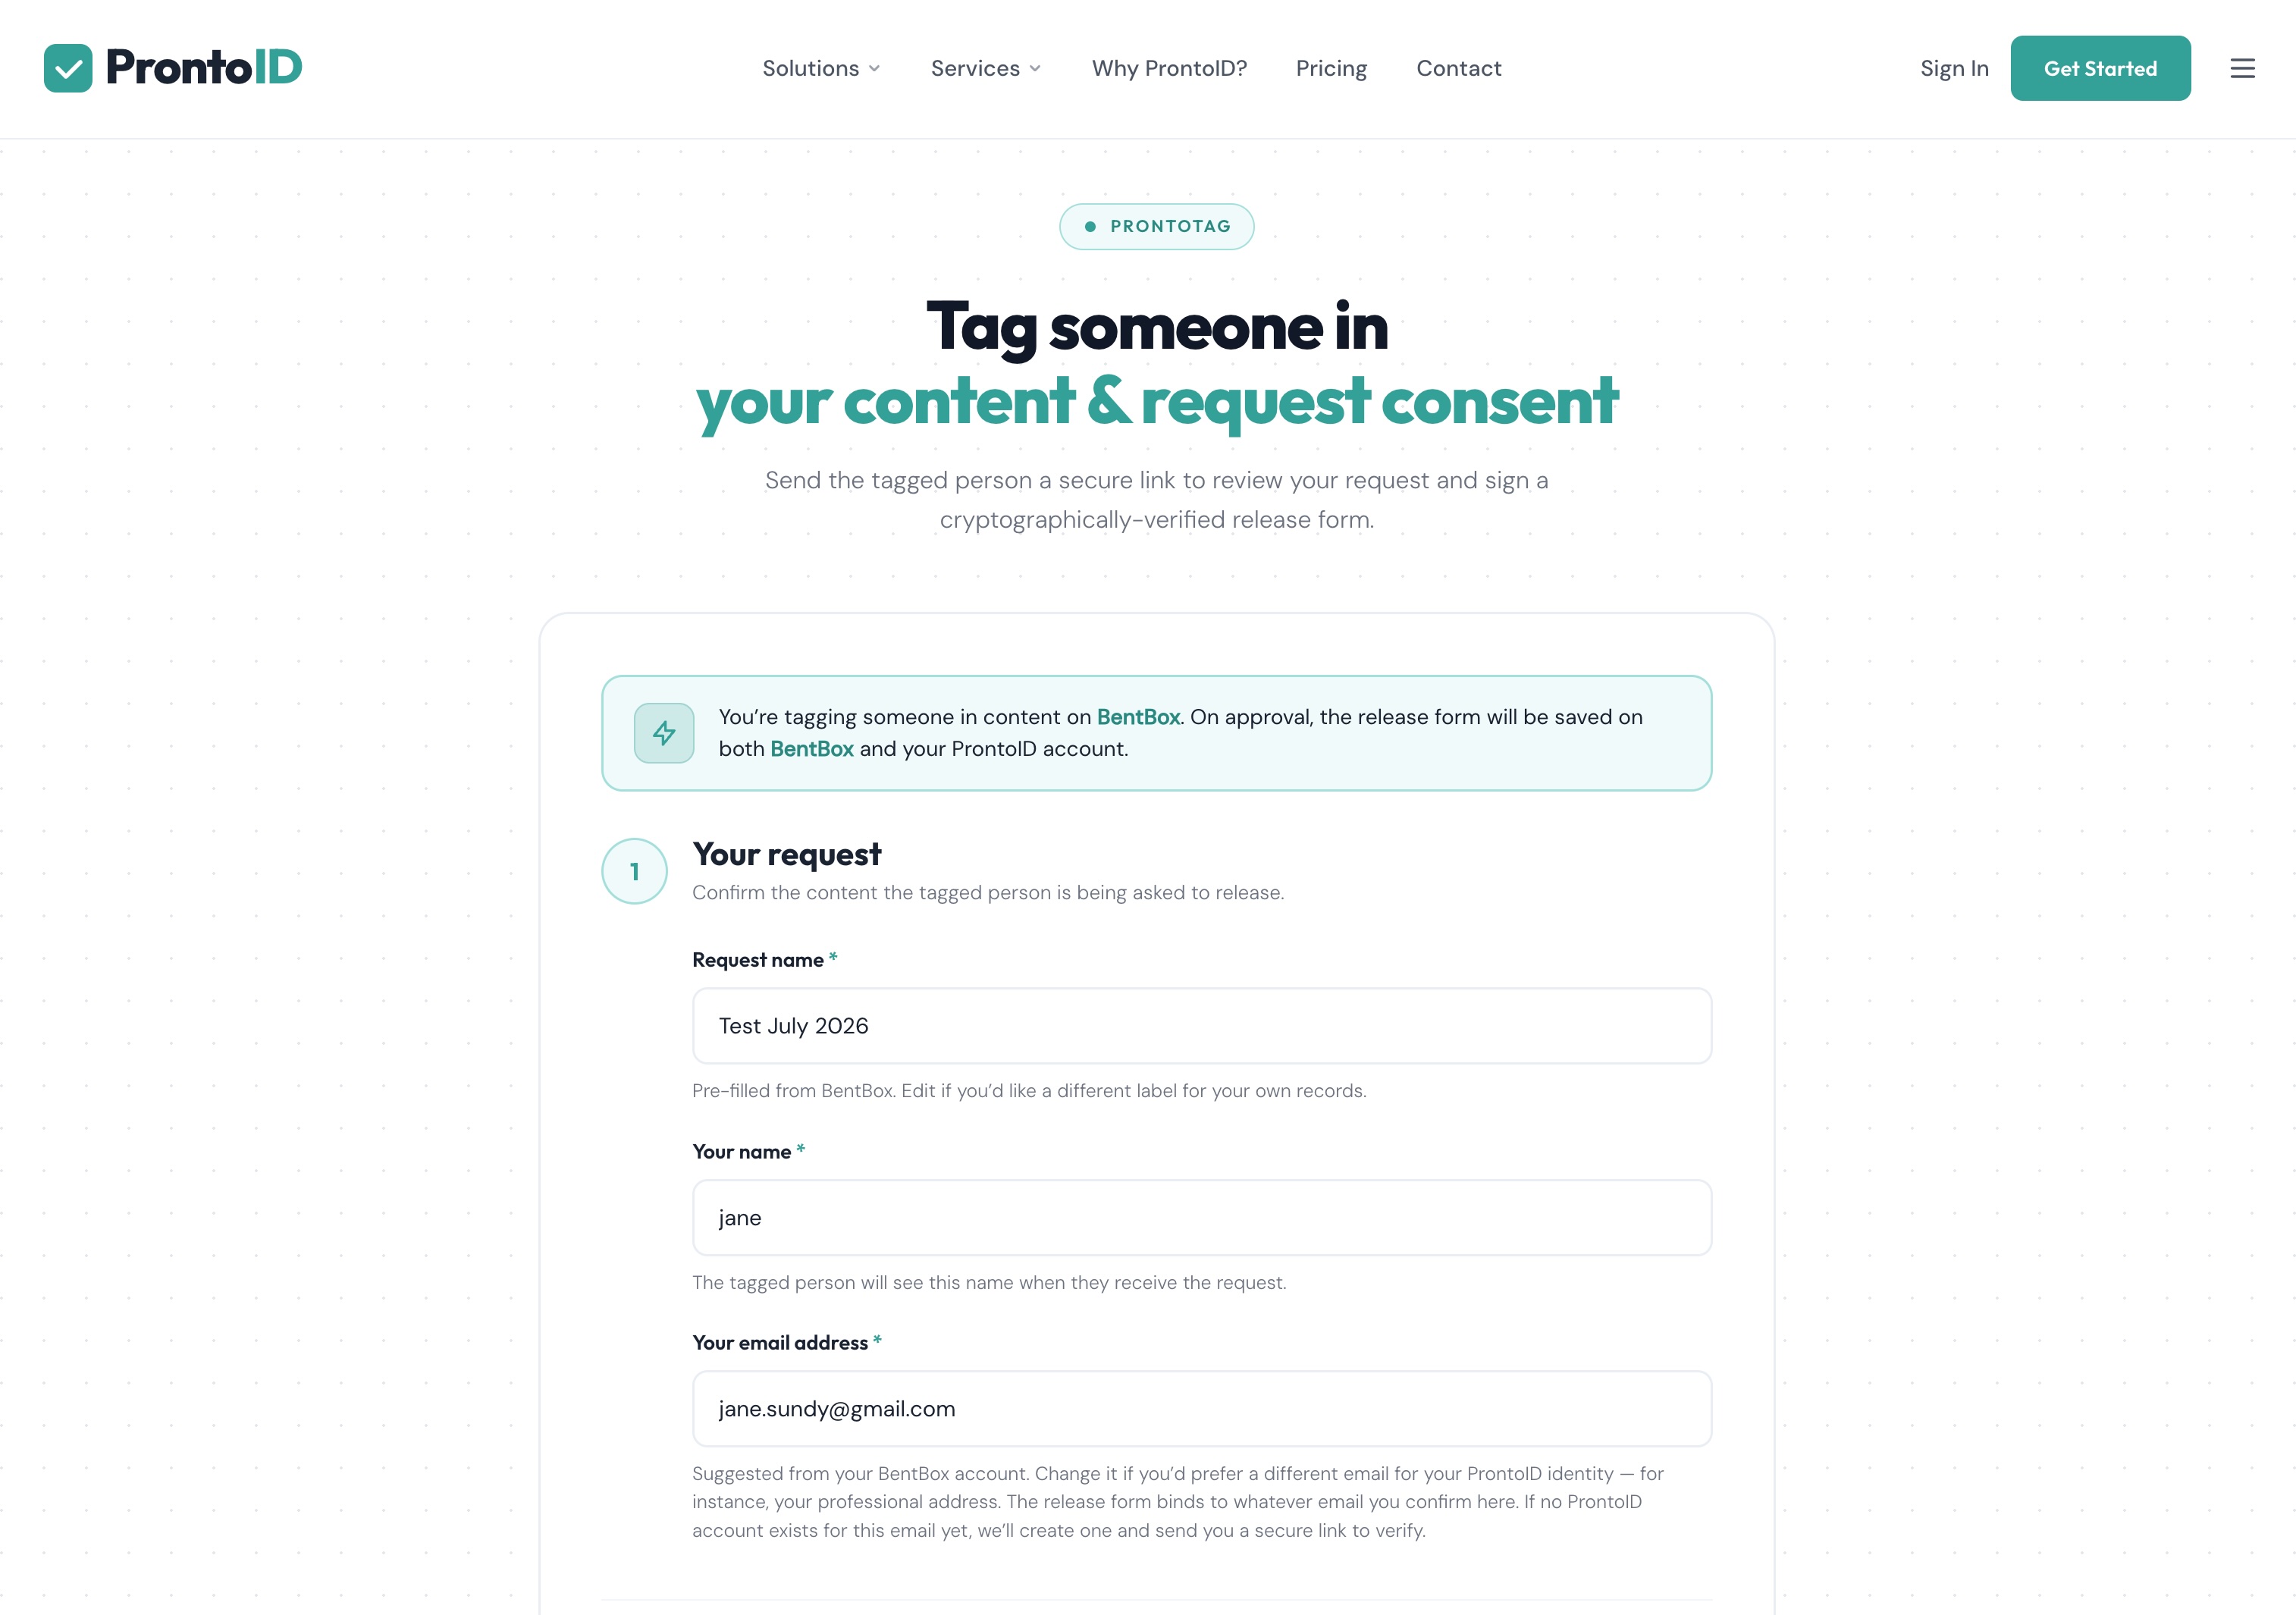
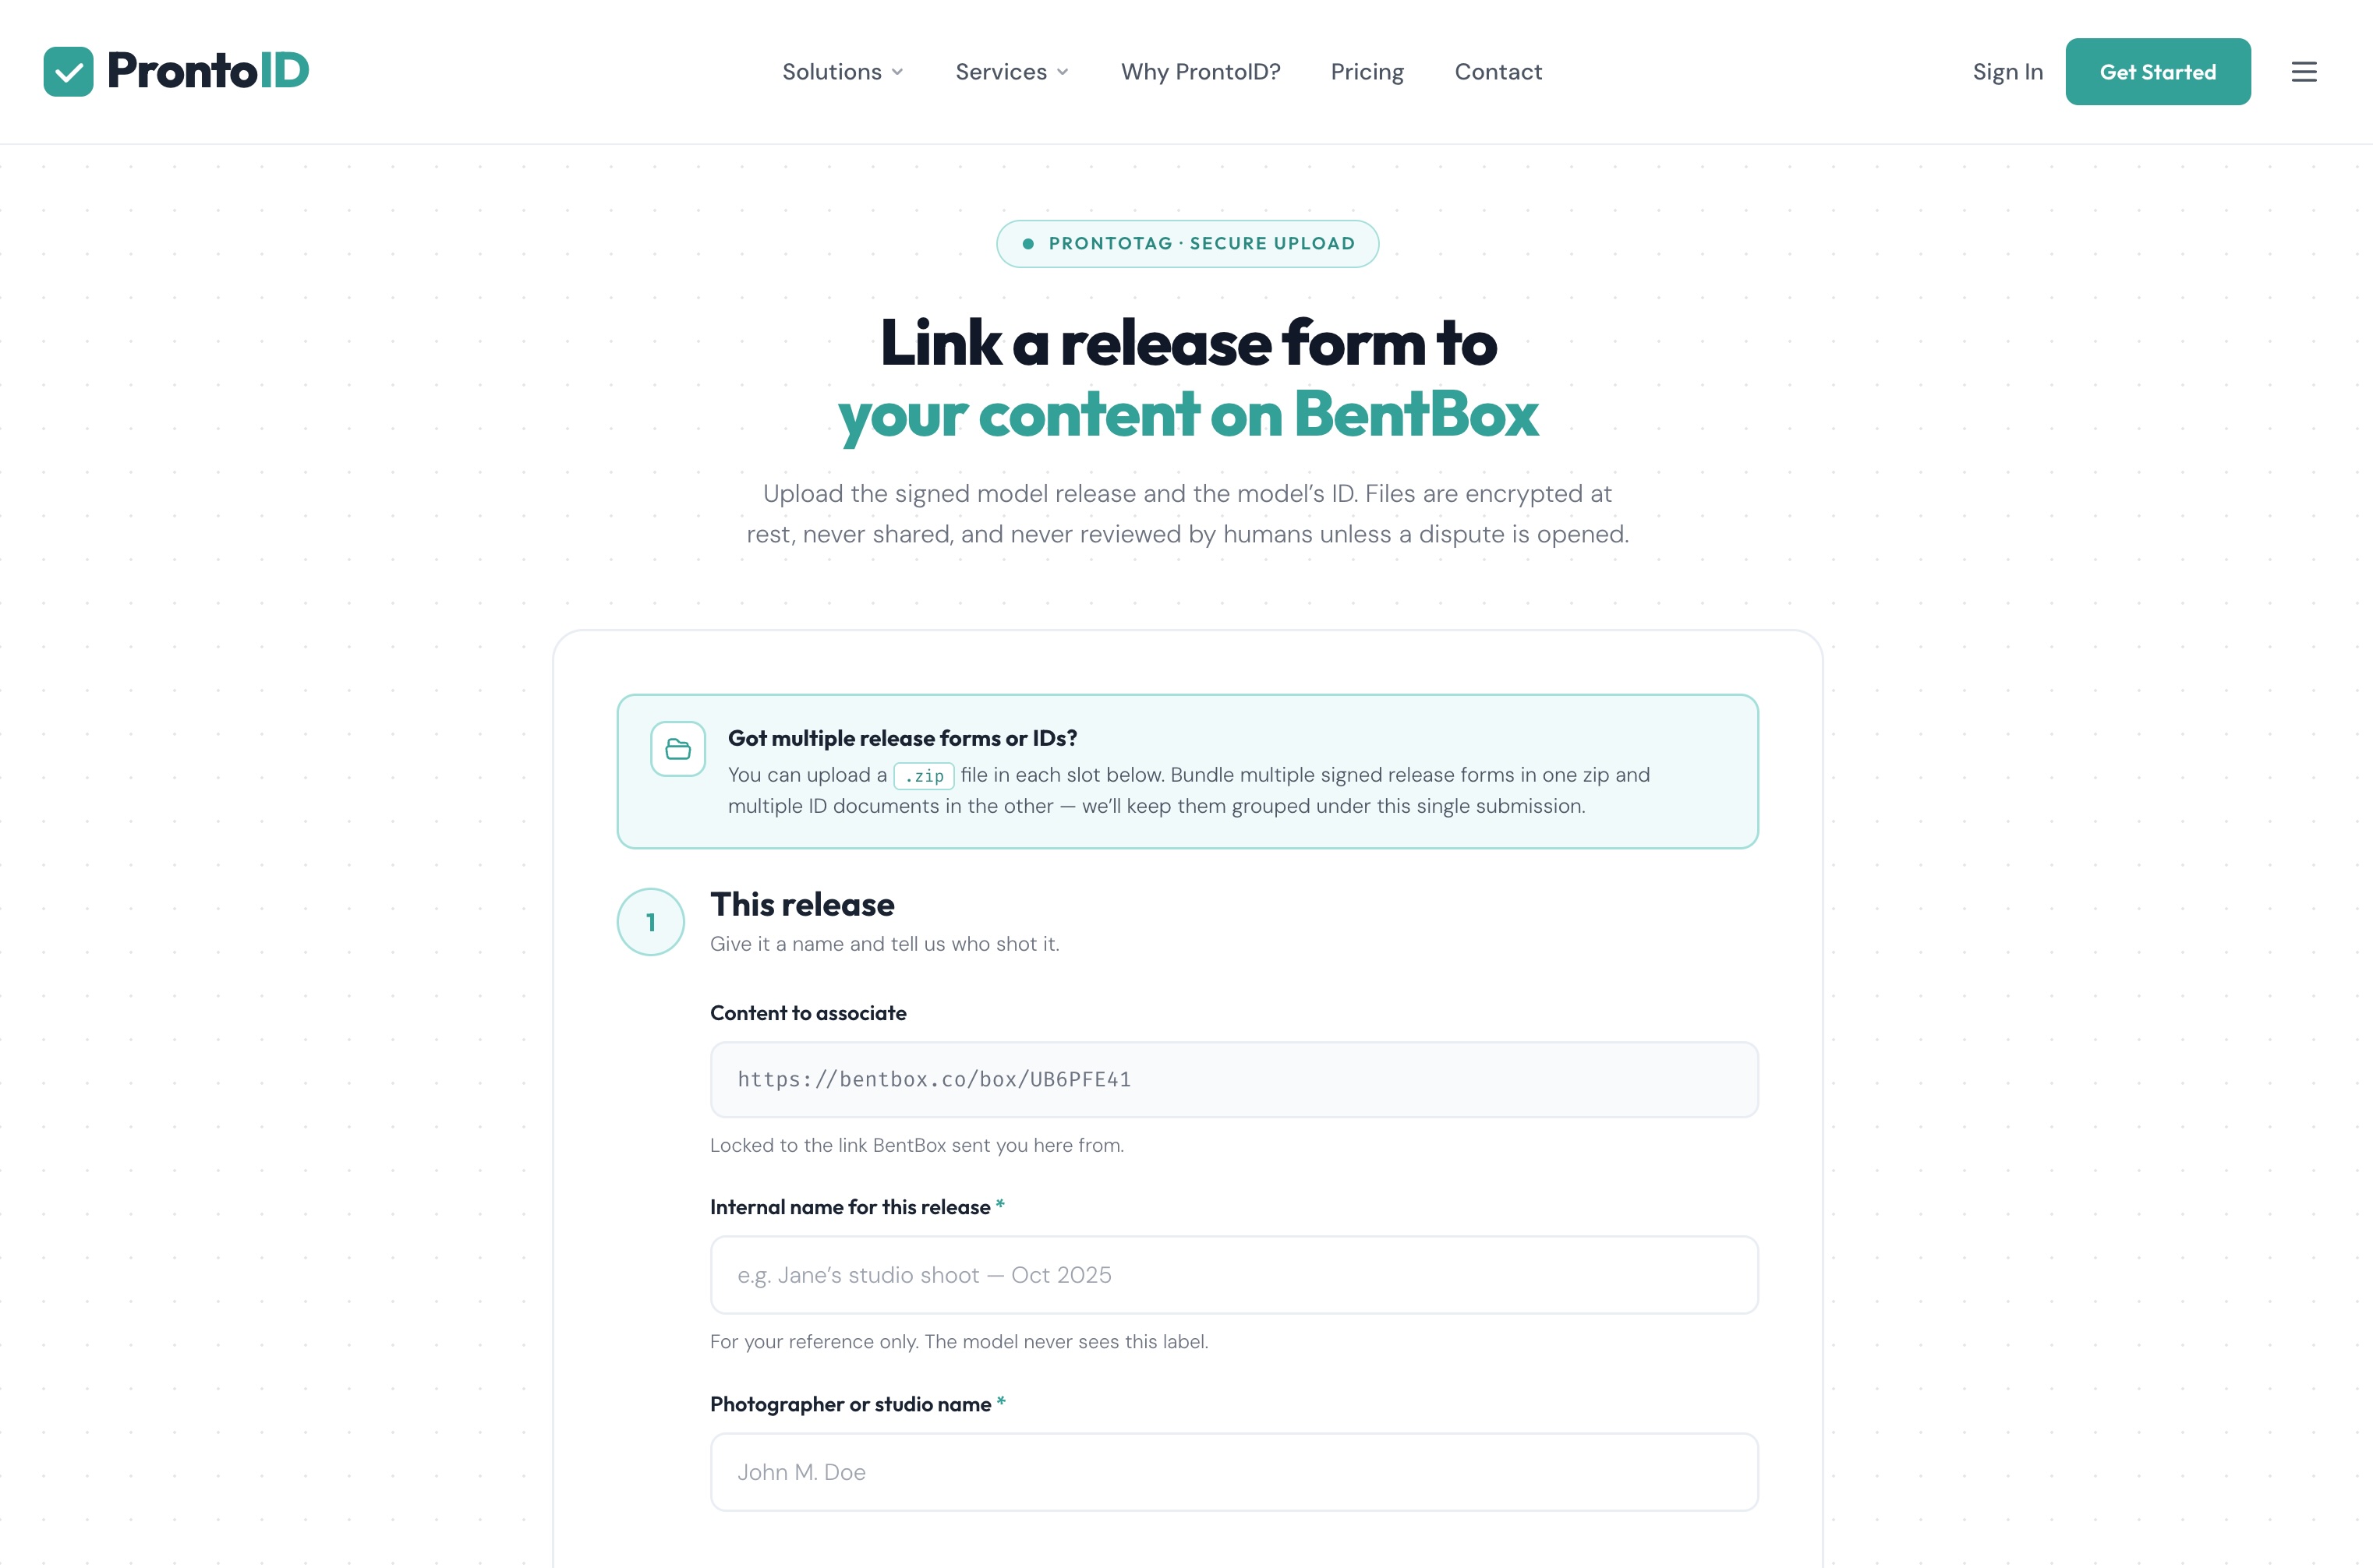
Add your basic details for the tagging configuration.
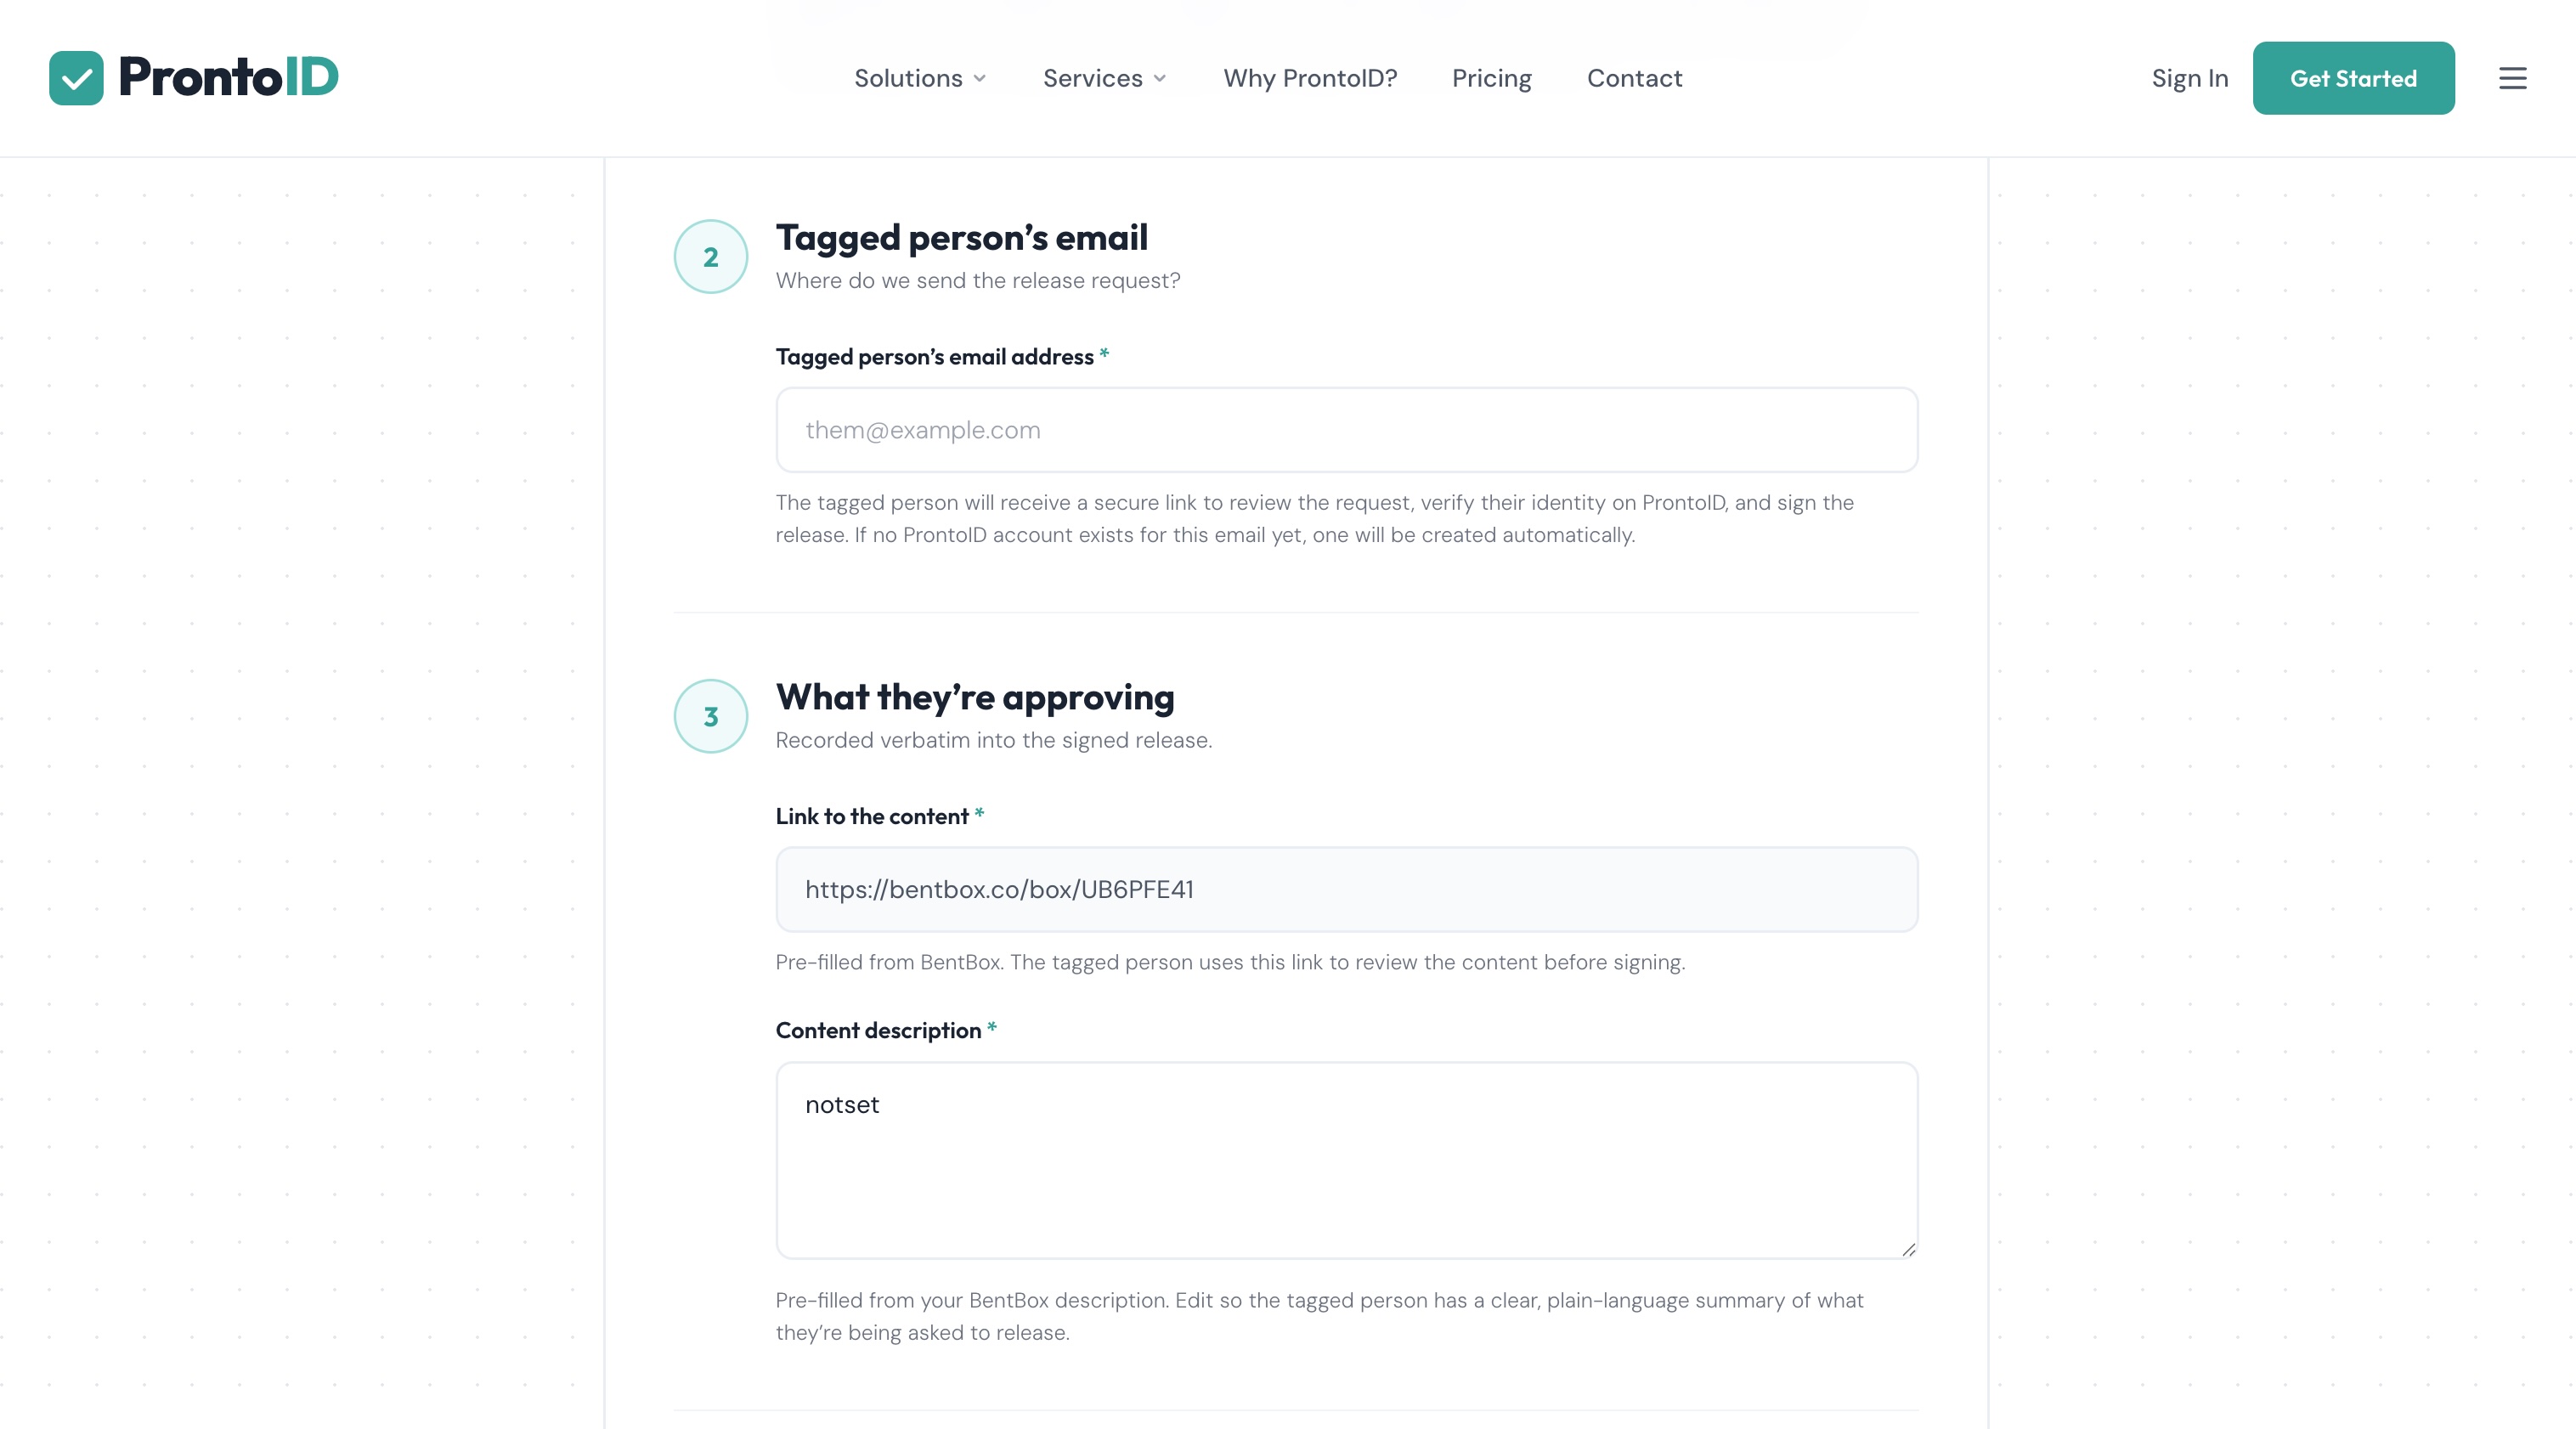
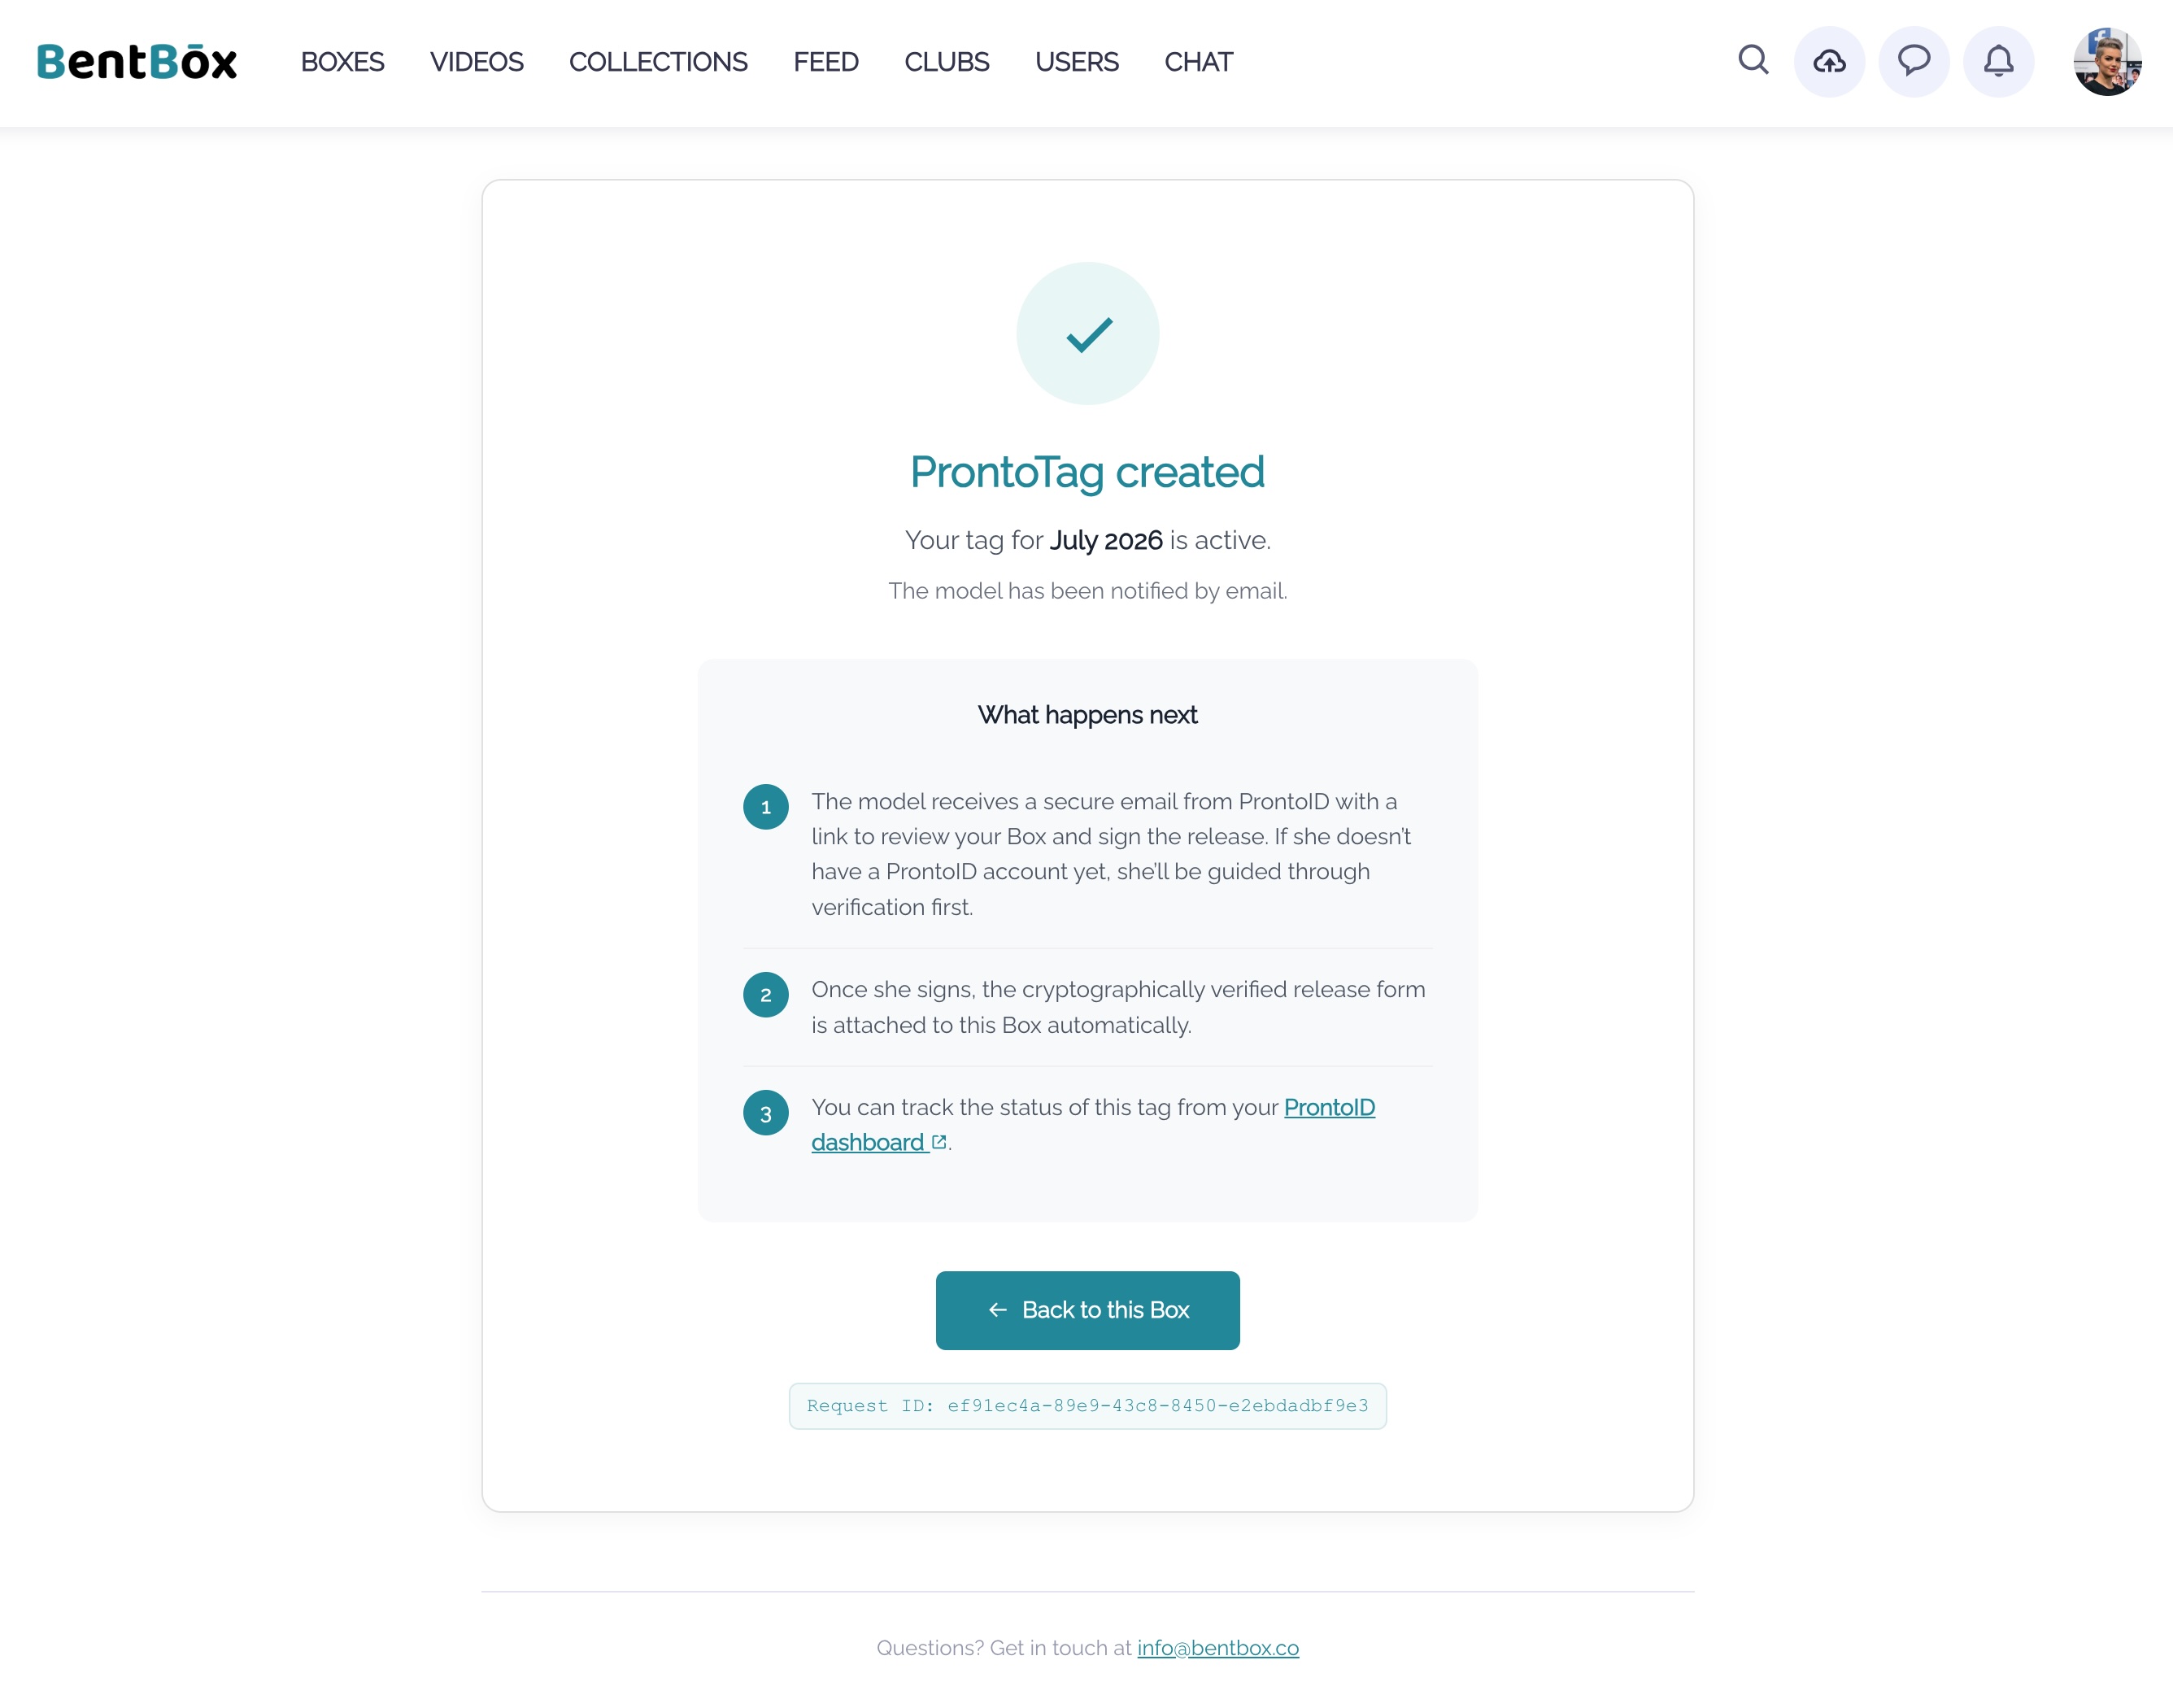
Add the email of the person being tagged. They will be notified of the tag and sign off by logging in to their verified ProntoID account. If they are not on ProntoID, they can create a free account and sign off on the release. The link to the Box is added automatically, so they can review the content via a private link.
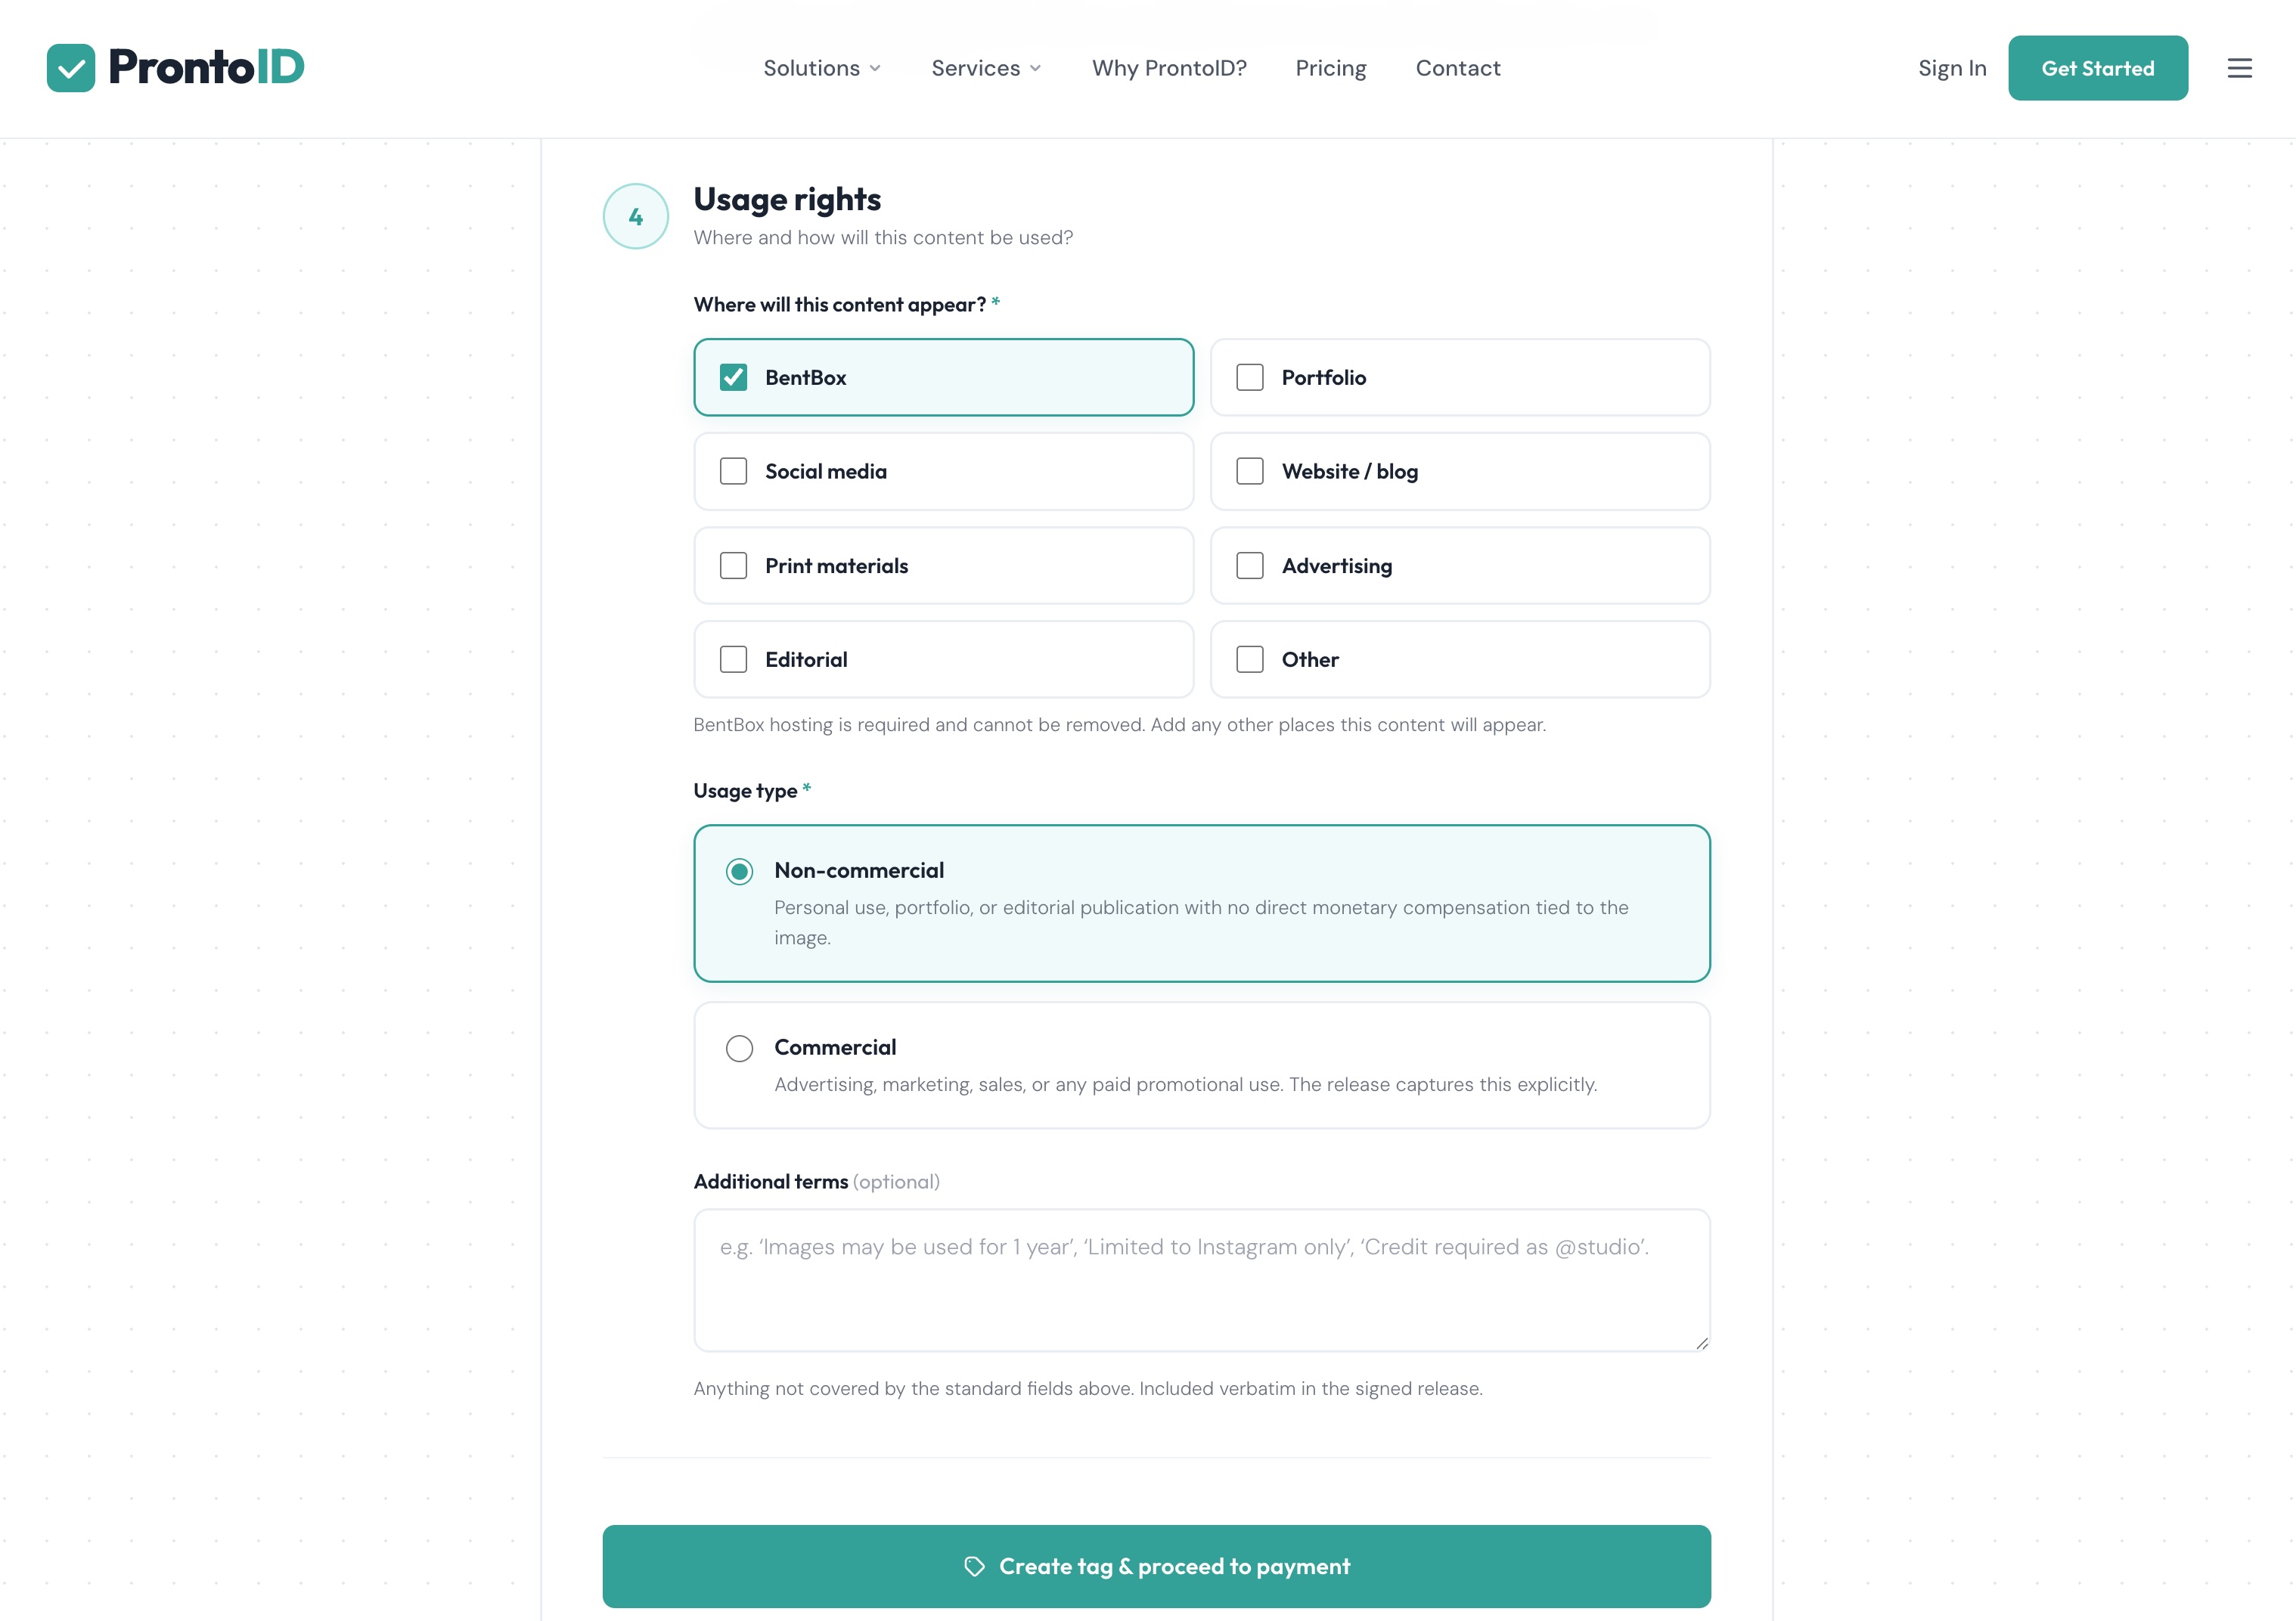
Complete the ProntoTag configuration by selecting where the content will appear, along with the purpose and usage type of the content. If you have any additional terms, add them in the field provided. Click Create Tag and proceed to the €0.99 payment.
If you decide to use an existing scanned release form for older shoots, fill in the Release Form field with the relevant information. The link to the Box is added automatically.
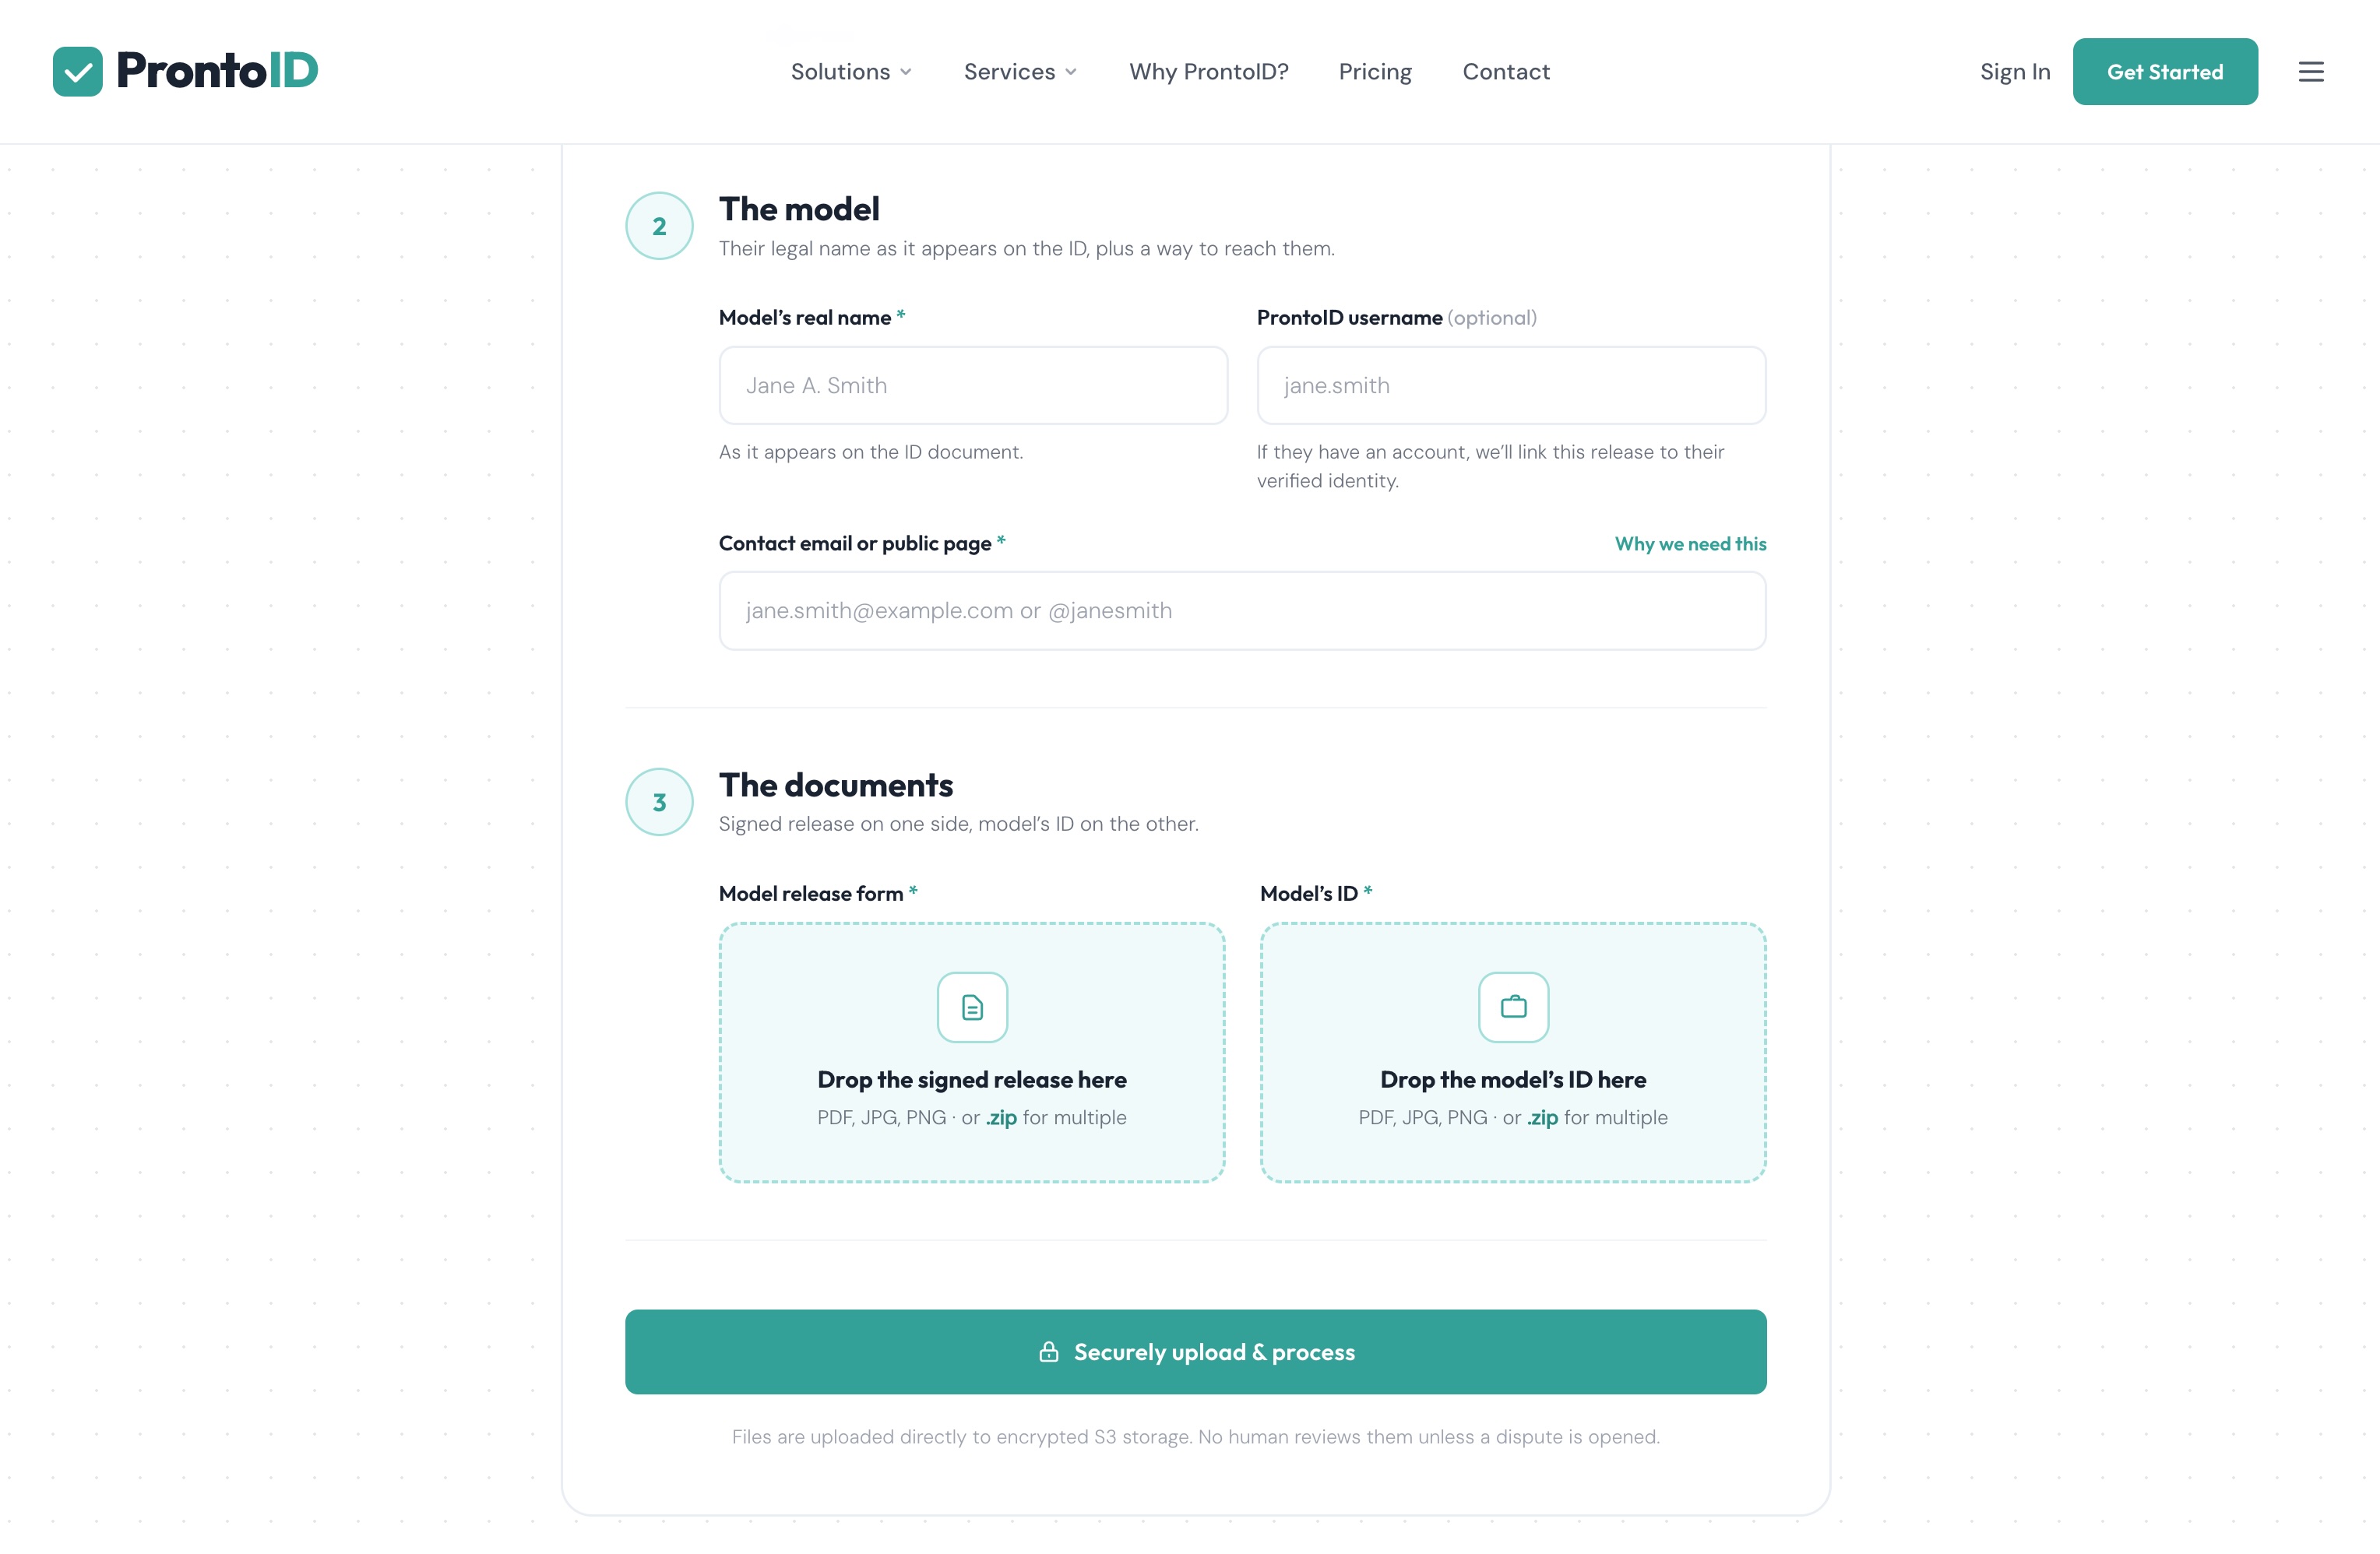
Enter the performer’s real name for compliance and, if they are on ProntoID, their username (optional). Then enter the performer’s email address — this is required under GDPR for the handling of their data. Finally, upload the scanned release form together with a scan or photo of the performer’s ID for 2257 and GDPR compliance.
The scanned release form is automatically linked to your Box, and you can proceed to publication from the Box Admin page.
From the Box Admin page, click Set Price & Publish to open the sale settings. Read the guidelines to make sure your Box will be approved, then enter the name, description, and hashtags.
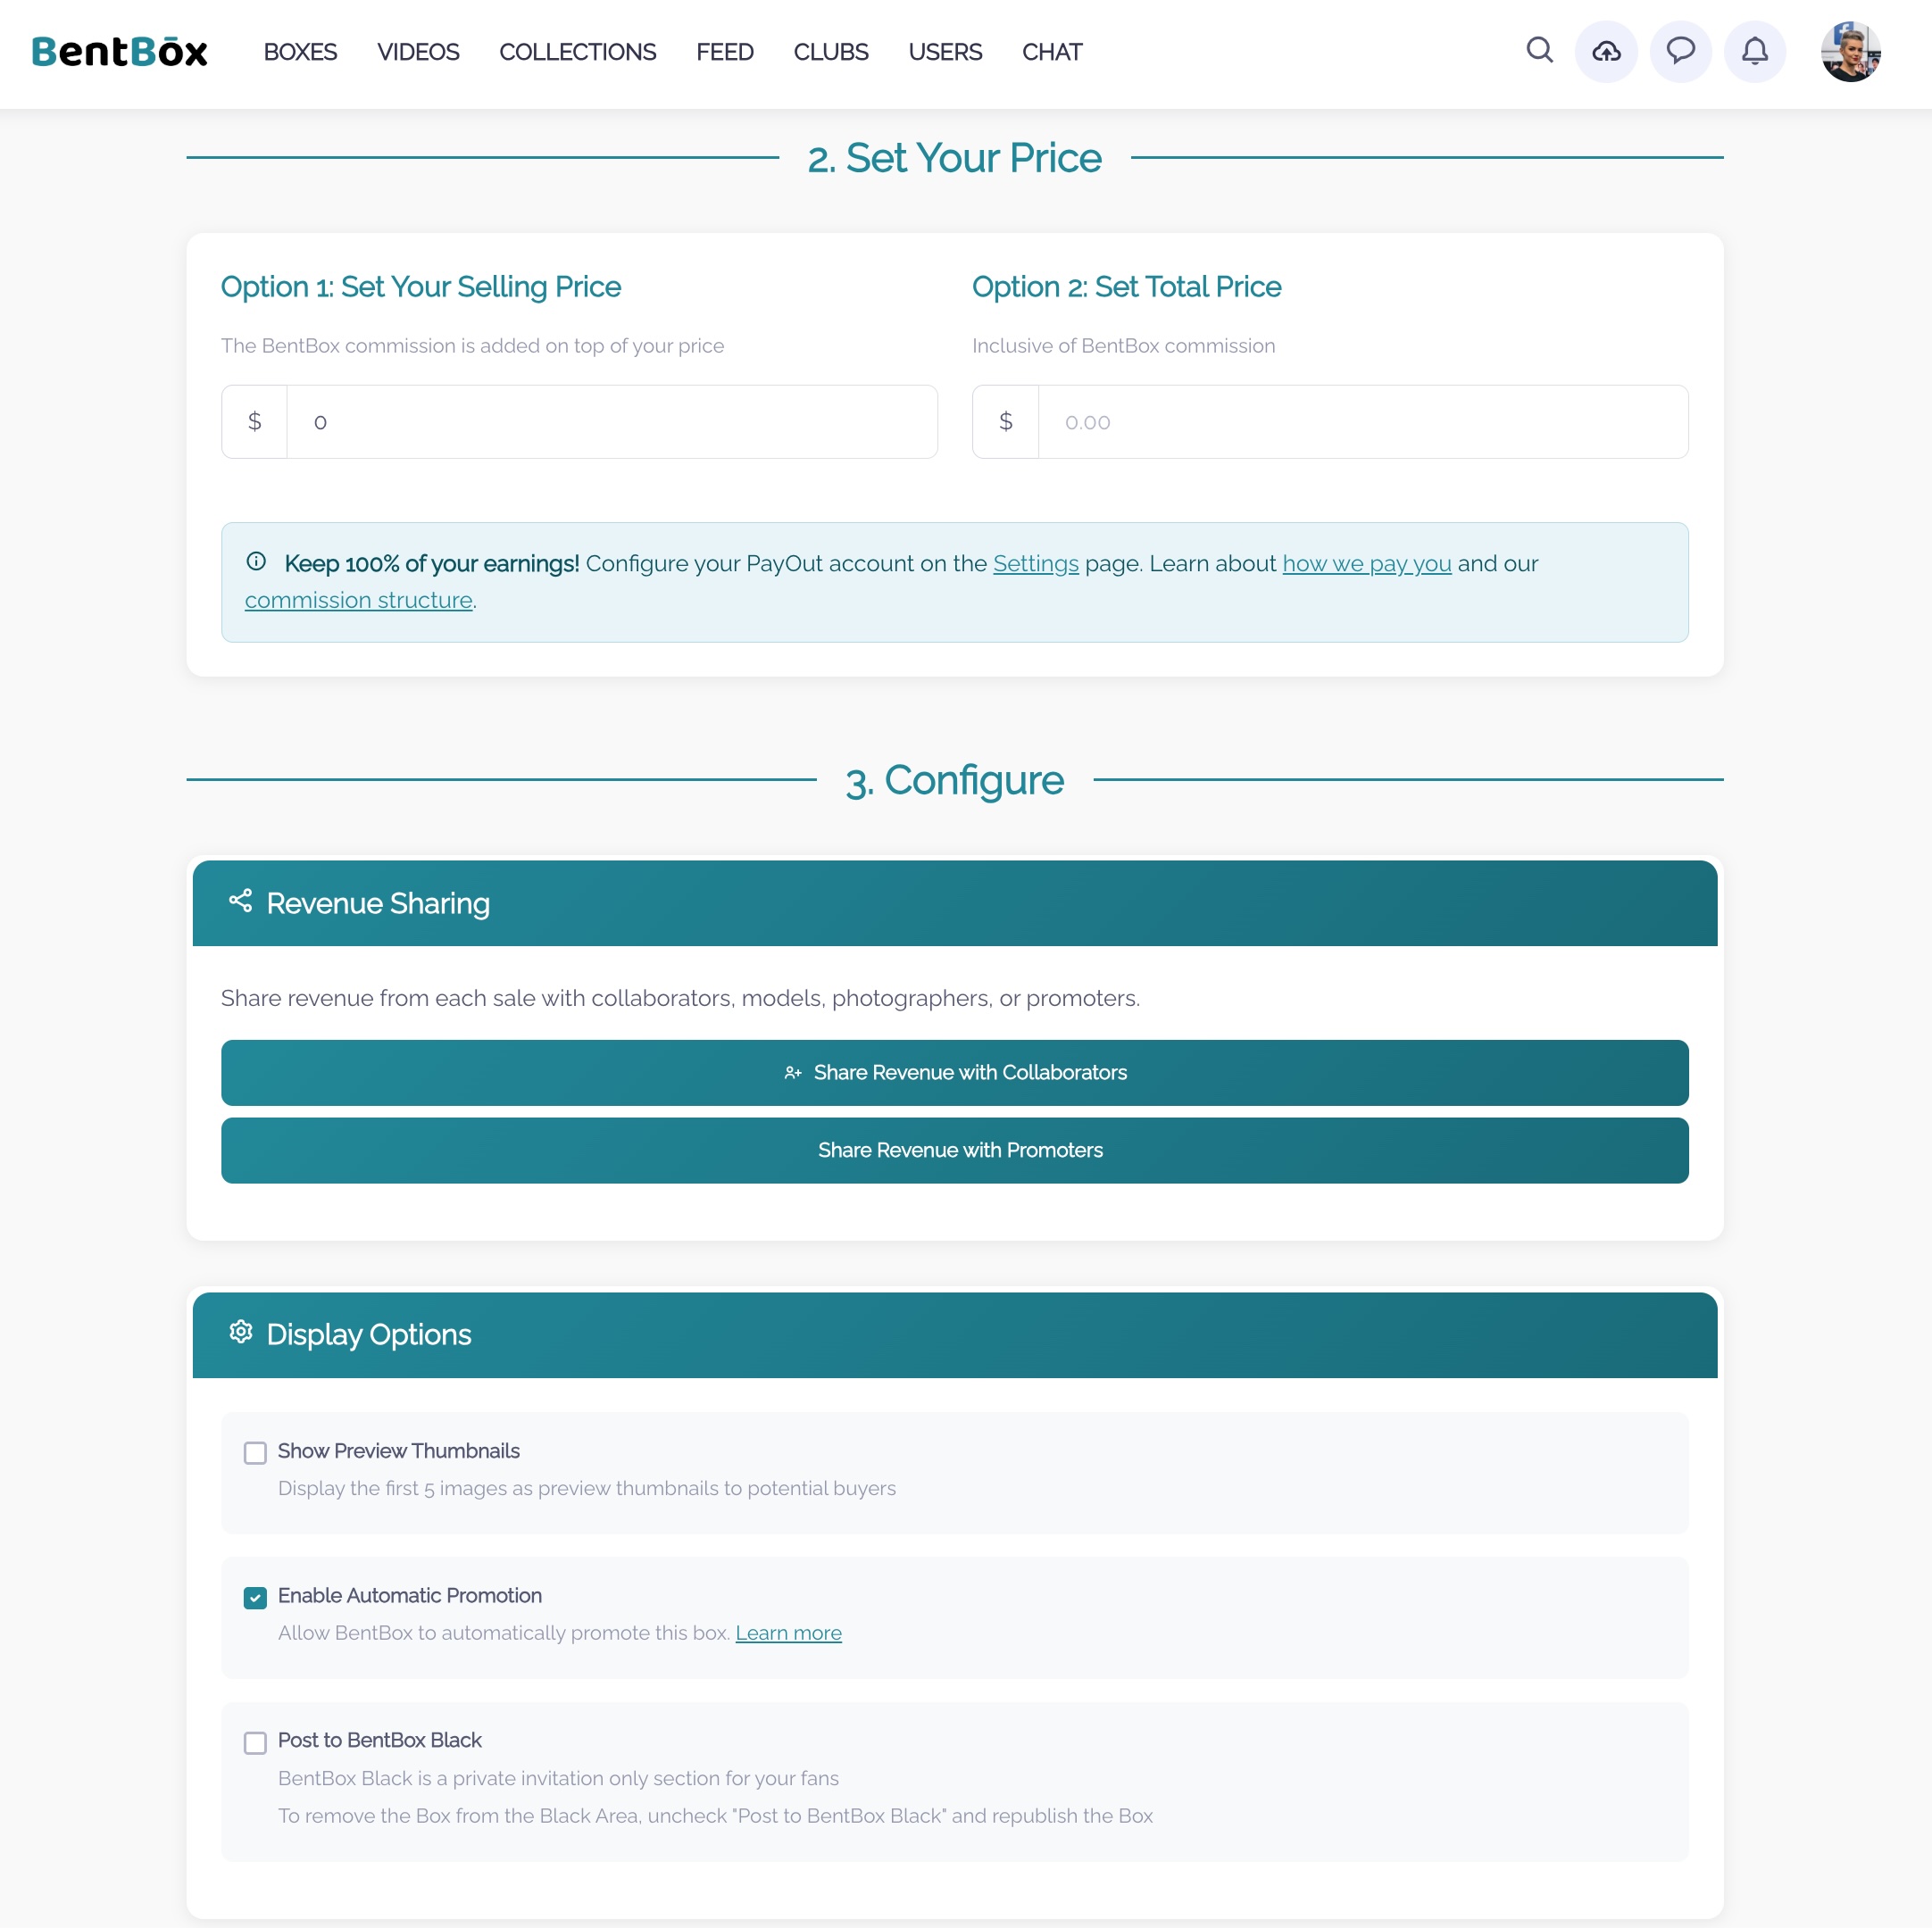
Enter the price. You have two options: (1) set the price you want to receive from every sale — BentBox’s commission is added on top and paid by the buyer; or (2) set the final price paid by the buyer — BentBox’s commission is deducted from that amount. You can then configure revenue sharing: share a portion with collaborators who worked on the Box, or with someone helping you promote it. Next, choose whether the previews are visible. You can also post the Box to BentBox Black, a private area accessible only to users you approve manually.
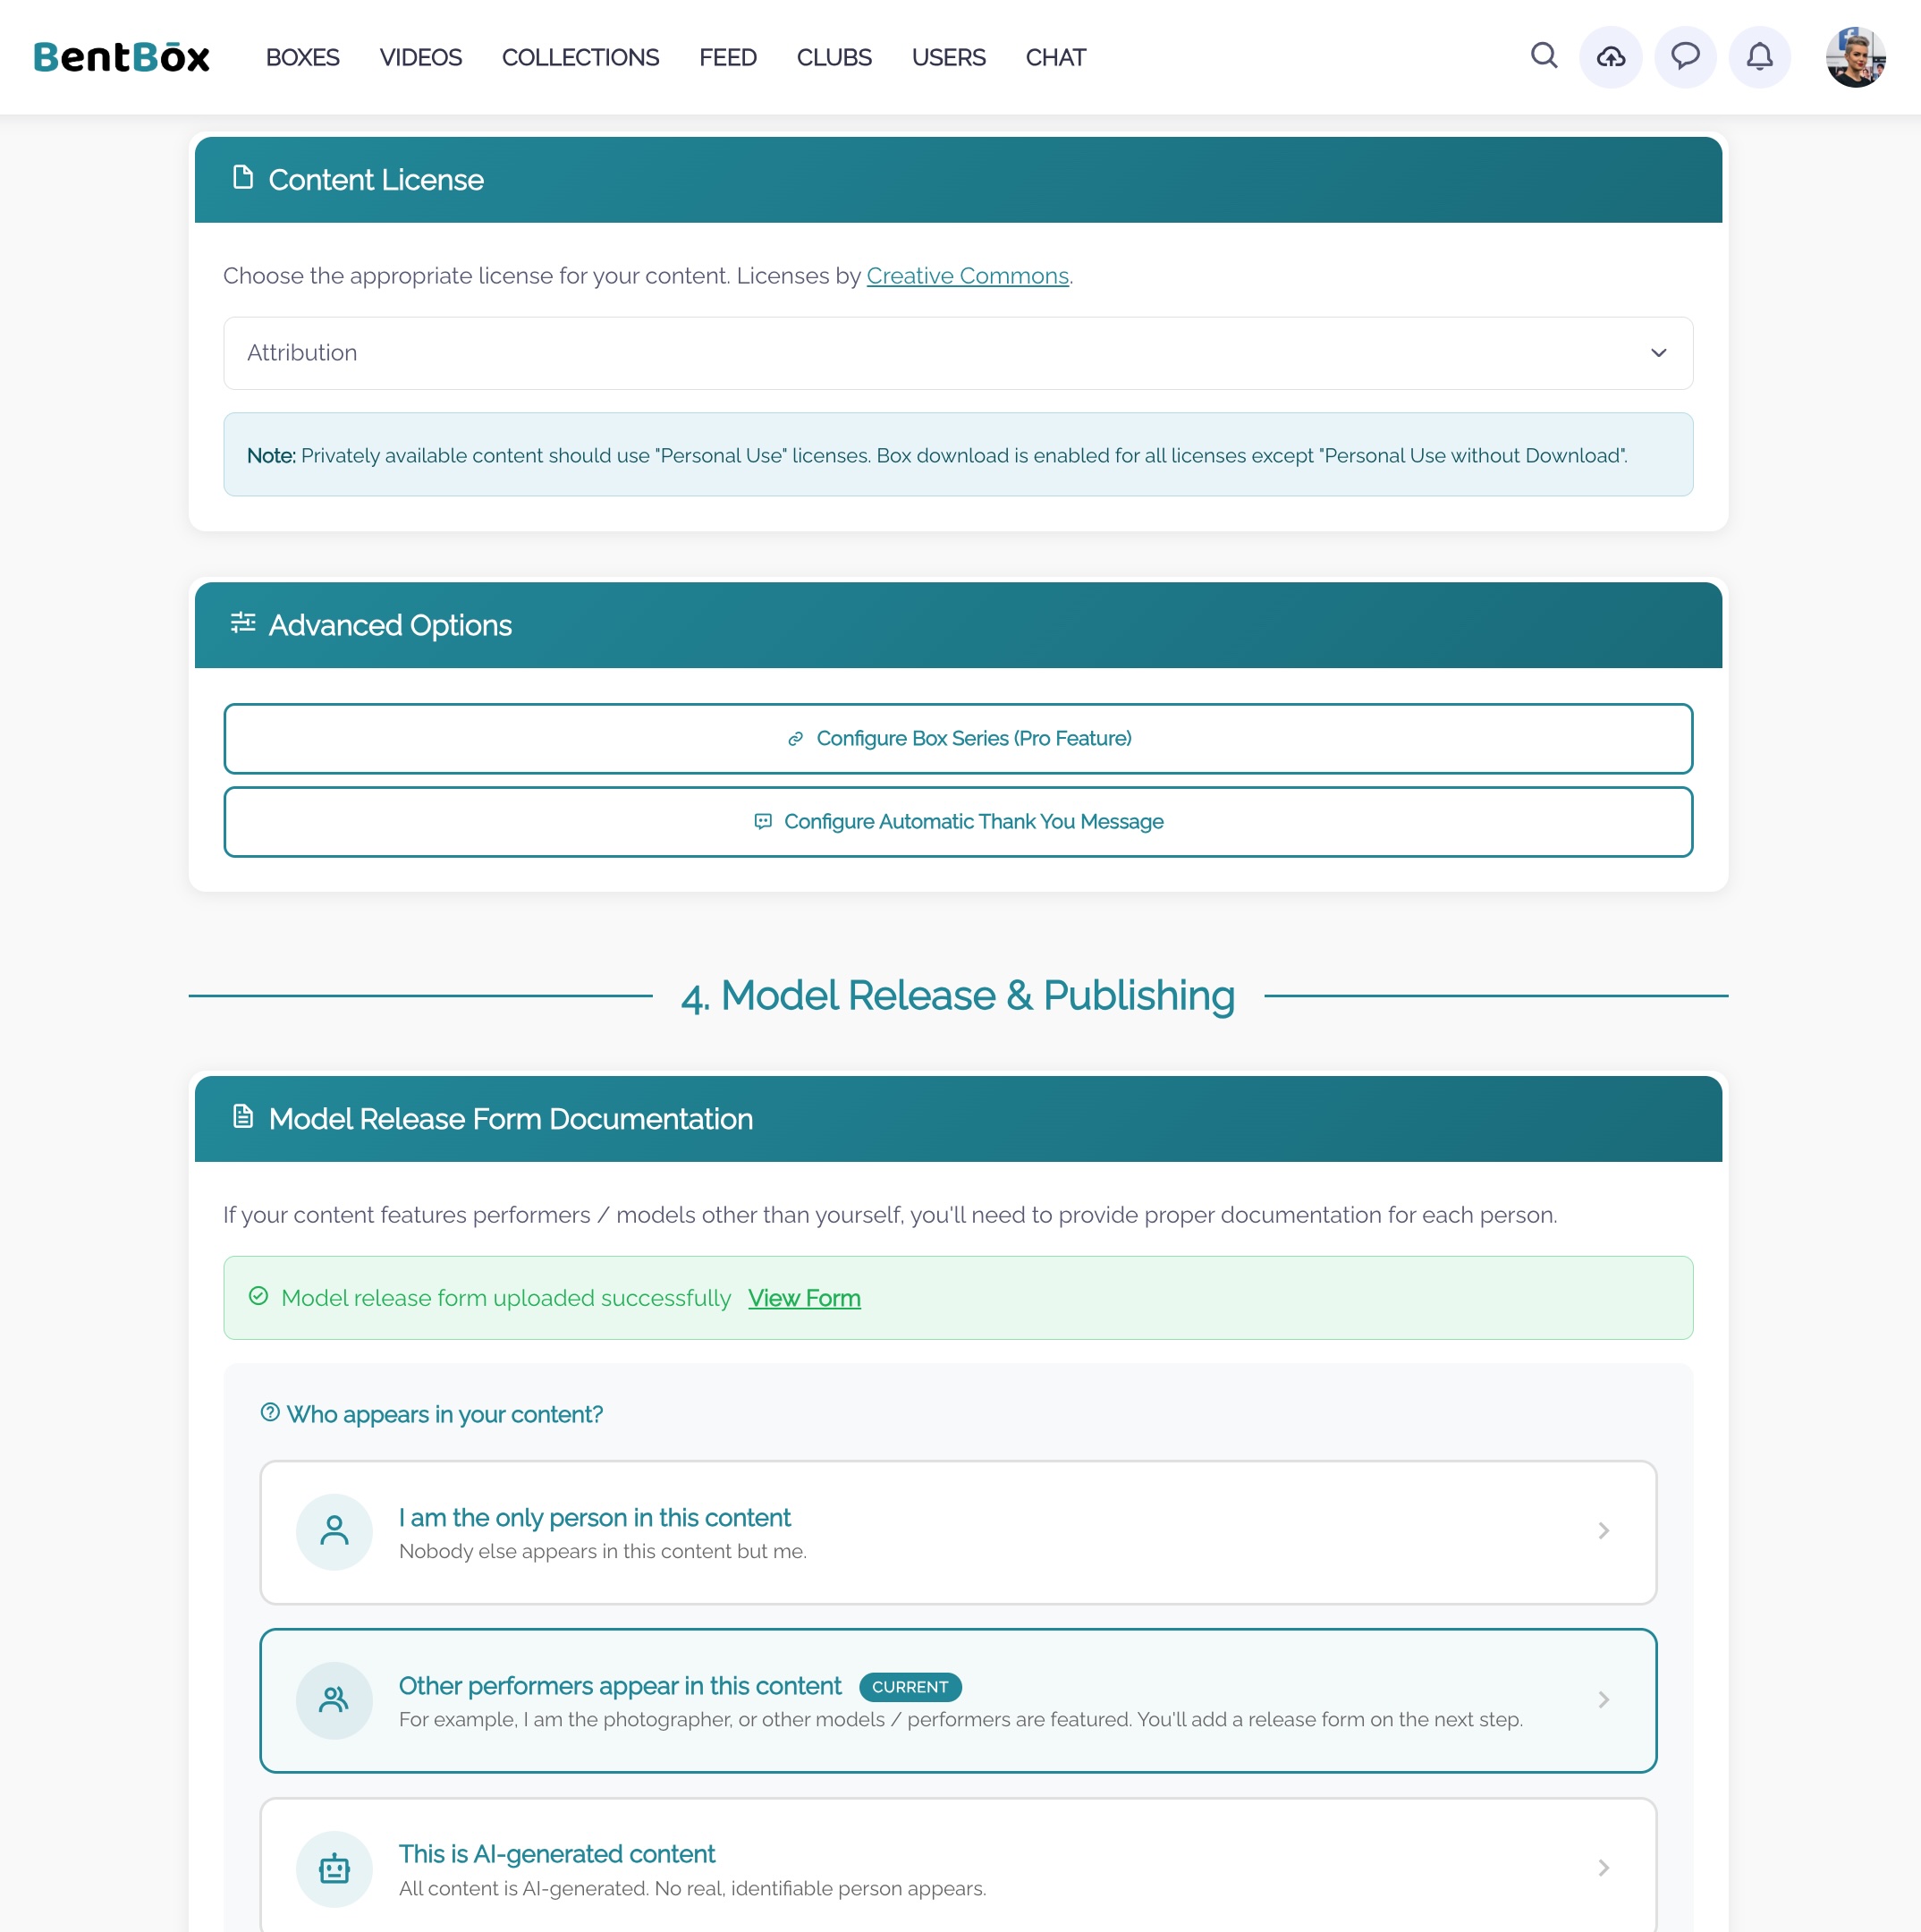
Here you can set the license for your Box and make it part of a series — where buyers must purchase Box A before they can buy Box B, and so on. You can also configure an automatic Thank You message, and review the model release documentation to update it if needed.
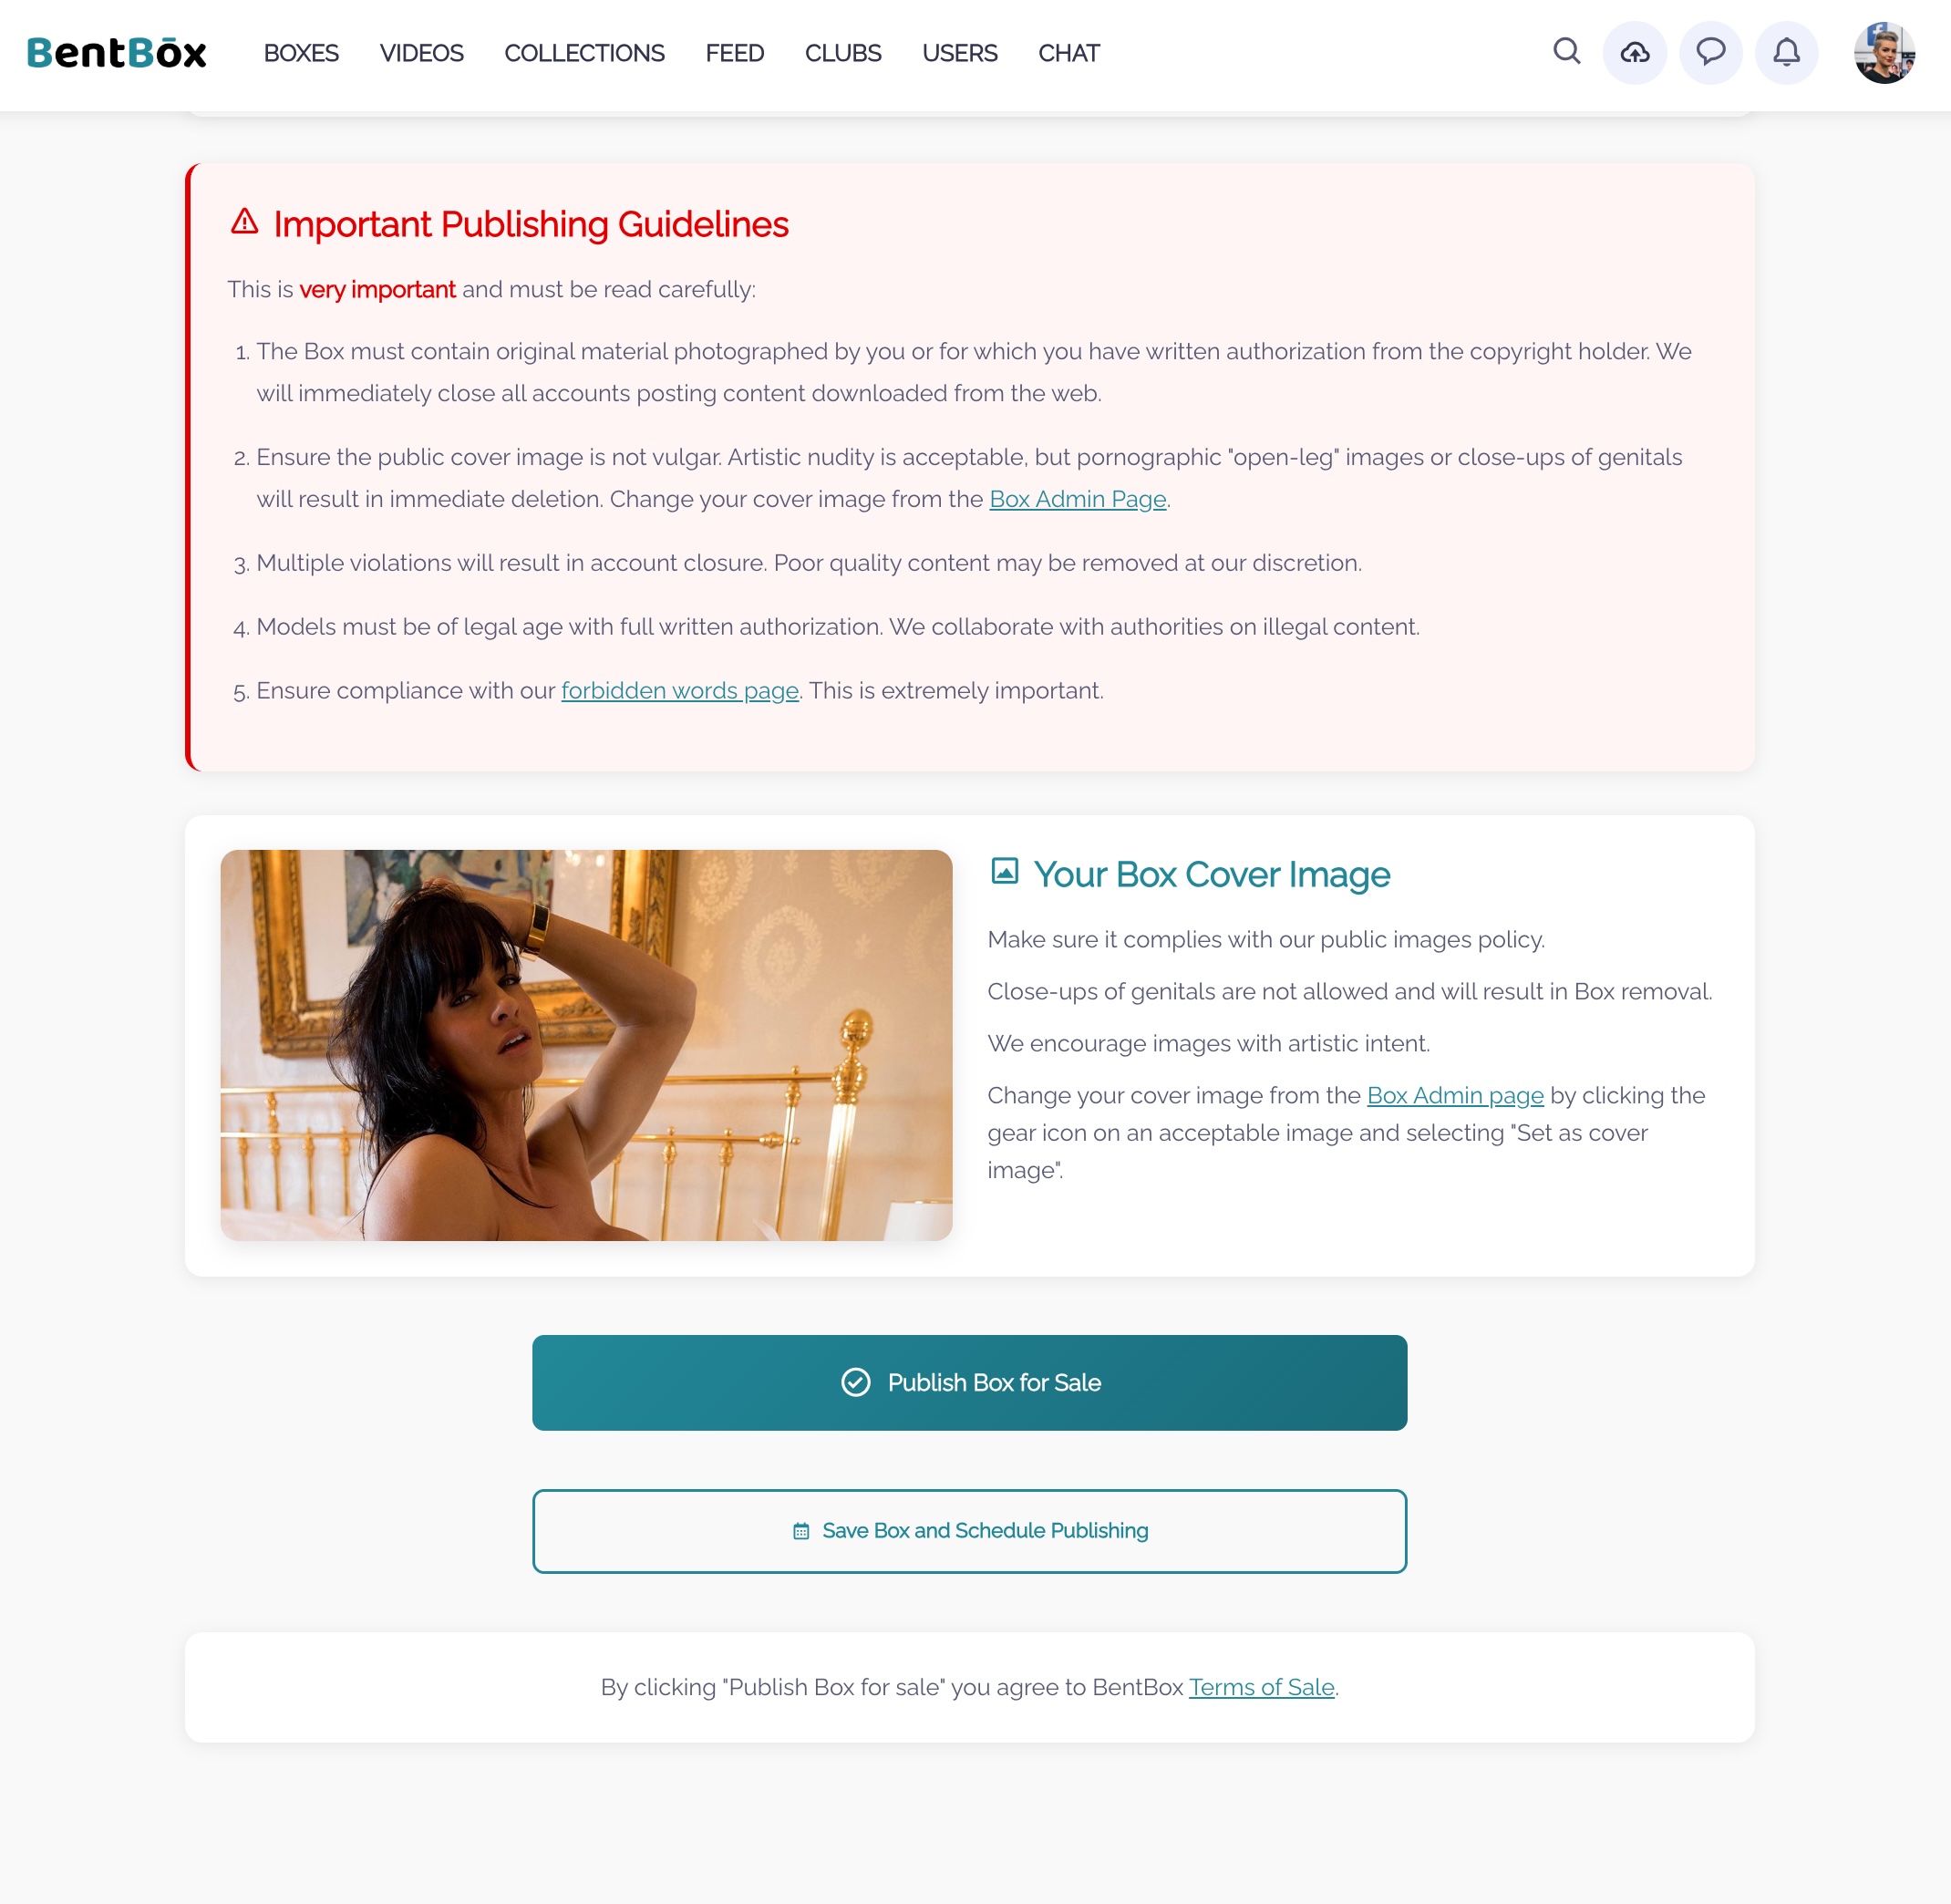
Final step. Review the content guidelines to make sure your Box will be approved. Confirm your sale settings and publish — or schedule the Box to go live at a specific date and time. It goes through moderation and appears publicly once approved, ready for buyers to purchase.
Open the builder, follow these sixteen steps, and you’ll be live after review.